A little review and test of my new solder pot
The solder I used is called “solder bar” or “Stangenlot” in German.

A little review and test of my new solder pot
The solder I used is called “solder bar” or “Stangenlot” in German.
Here are two sound demos of a TR606 and a CR78 I midified.
Note the full velocity sensitivity capability of the 606 and the pseudo-velocity sensitivity of the CR78.
TR606:
CR78:
Some more infos about the CR78 mod:
Depending on the midi velocity sent to the device, the master volume is adjusted. That is of course not the same as full velocity sensitivity, but gives you a surprisingly great amount of flexibility. Think of the 808 for example which has one accent track – this is similar, but you can adjust the accent on the fly.
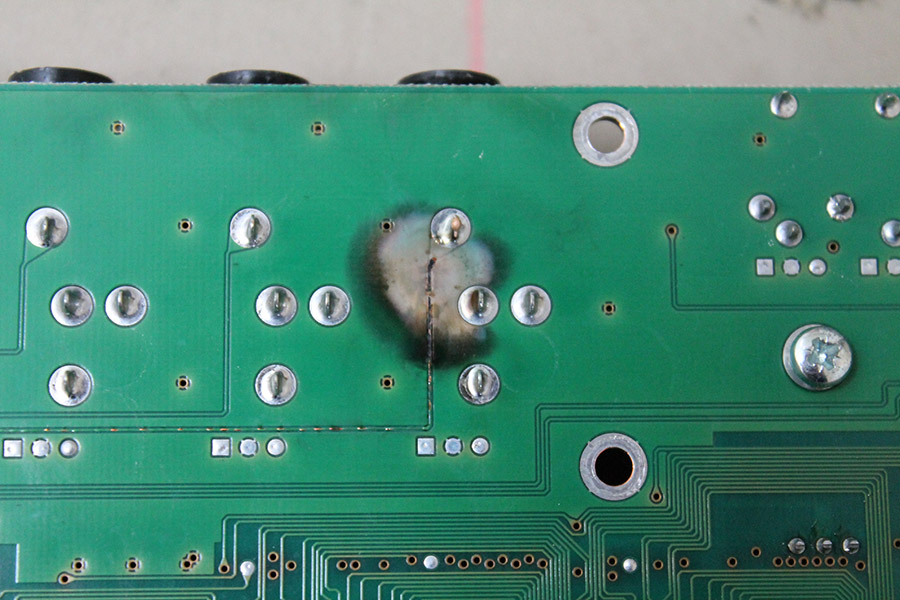
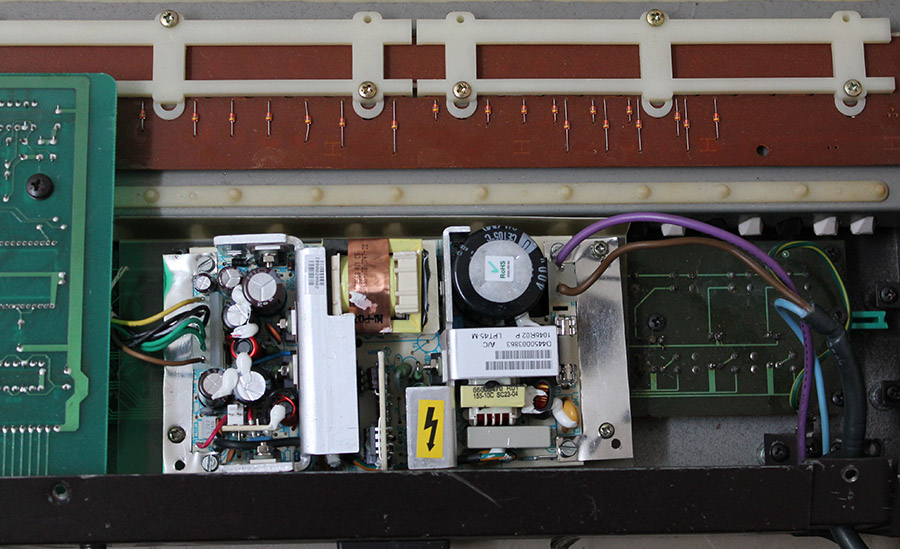
This Novation Supernova just came in.
probably due to overvoltage on one of the outputs two of the outputs failed.
Which is actually really lucky, take a look at the damage!
This is the bottom side of the PCB, the trace coming from the connector vaporized and you can see how much heat must have been there: A large area of the solder resist is gone too. If you look closely you can see, that the trace actually fused with the surrounding ground plane. I believe this is what saved the Supernova, because it protected the rest of the circuitry from the high voltage.
This is the other side. I already desoldered the connectors. As you can see there was a lot of heat here, too, the trace acted like a fuse and melted and the 47Ohms resistor exploded. Wow!
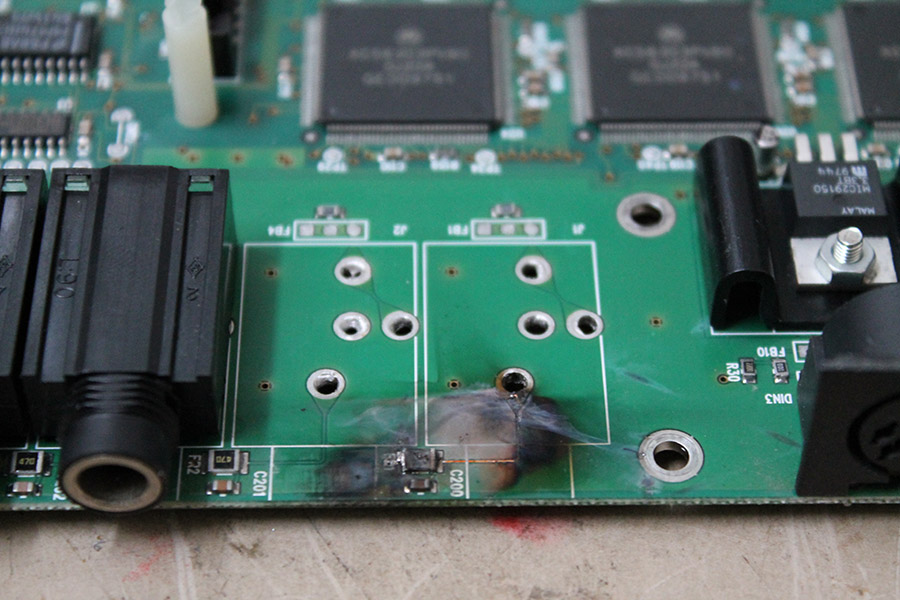
These are scorch marks on the metal enclosure which was about 1cm away from the PCB.

Apart from that only some more resistors and an op-amp failed. Amazing when you consider what must have happened here!
I replaced the broken SMD components, redid the broken traces and the two outputs are working again 🙂
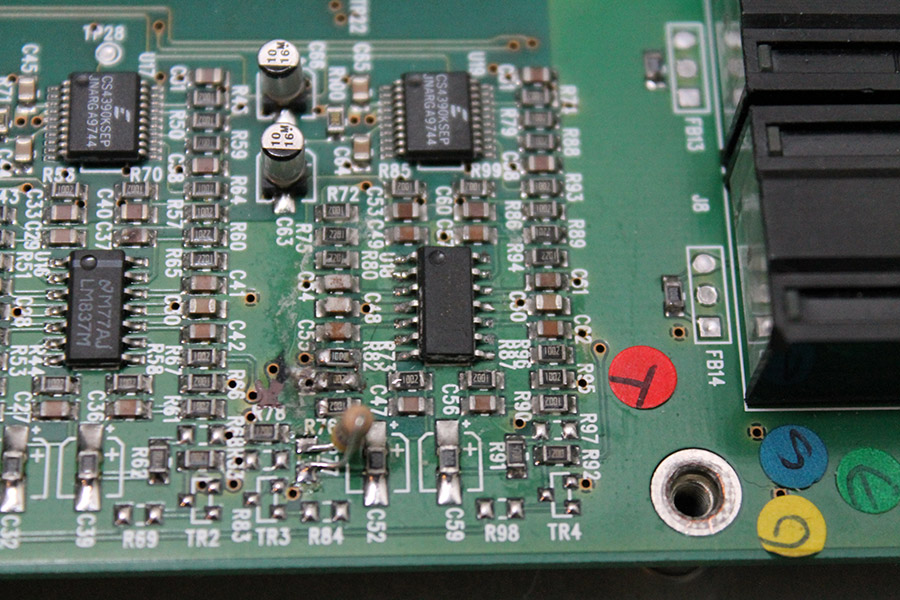
In the picture above you can see the replaced opamp and some replaced resistors. Unfortunately I didn’t notice a broken 740 ohms resistor before I ordered the parts. I used wired one instead, doesn’t look as nice, but works as well.
Look at this horrible “repair” job someone did to the power supply of this Yamaha DX21 (which broke again of course)
The main electrolytic capacitor has been replaced with just some other one, definitely not a low-ESR type, connected with quite long and thin leads and then glued into place somewhere in the case. The switching transistor is glued into place too and the traces leading to it are almost, but just not quite broken.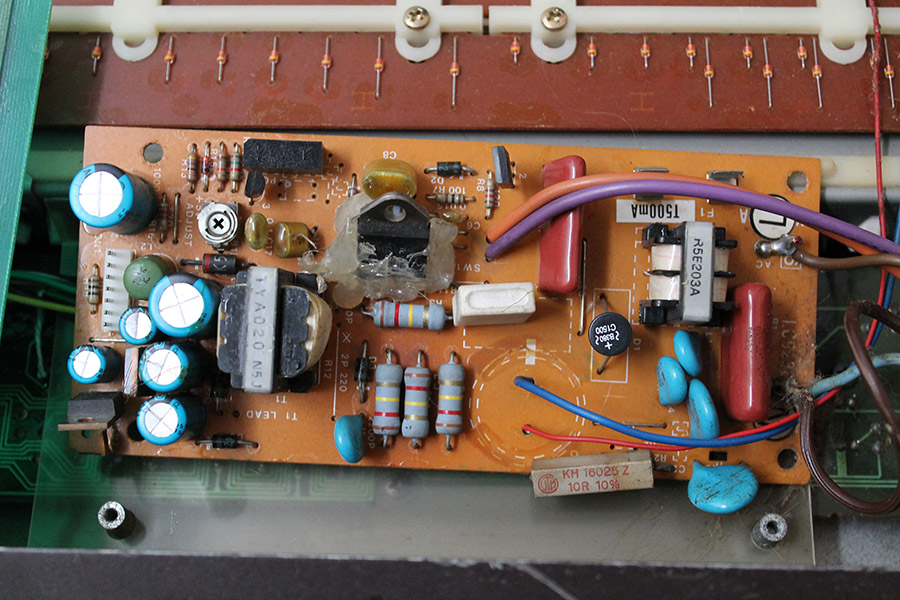
An additional power LED had been added, but instead of connecting it to the 5V rail, it is connected directly to 230V via an capacitive “led power supply”.
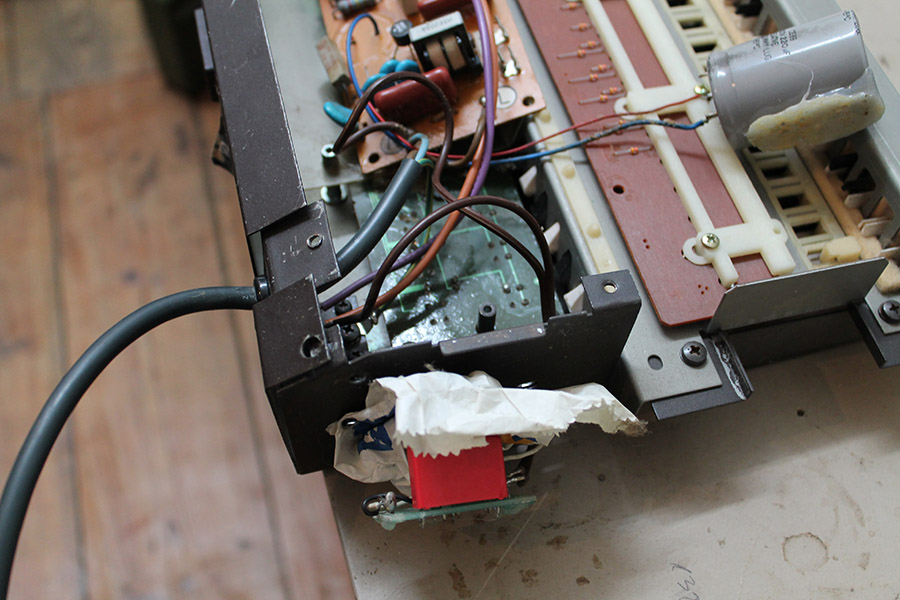
Last but not least there is some strange sticky stuff all over the place, might be electrolyte from the capacitor, or some kind of glue that was used for something. It is hard to tell, it is an awful mess in there. 
In cases like this instead of trying to fix the existing power supply it is better and cheaper to replace it with a new one.
Good news!
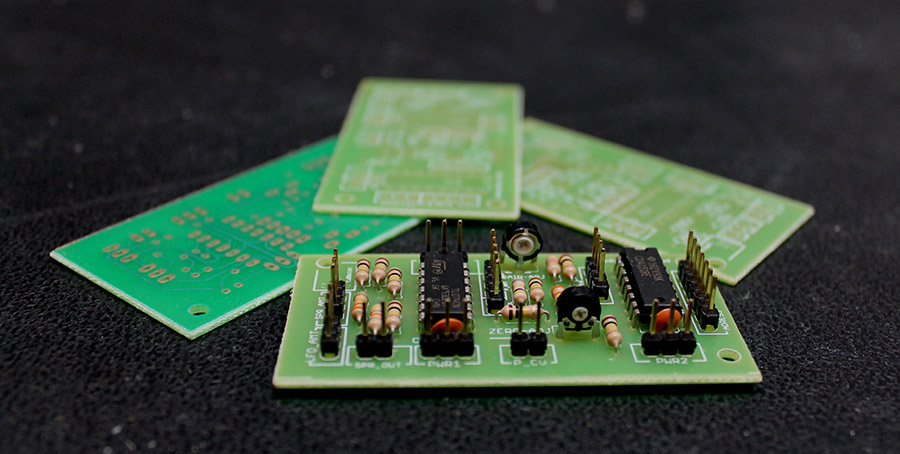
The prototype boards for the Polysix mod finally arrived from the manufacturer after four long weeks of waiting. I will run some tests, see if everything works as it should and then go into production.
So you’ll be able to get the kit soon 🙂
Steph and me jamming with the Elektor Formant and the midi interface I’m developing…
note the polyphony 😉
You’ll be able to get the midi interface soon, see 4x Midi CV Interface rev.2 for more infos…
This Sequential Tom needed a new power supply. It states to need 15V AC, but after a little bit of reverse engineering it turned out to actually need 2×7.5V AC. It is quite unlikely to find a wall adapter with 2×7.5V AC, so I had to build an own power supply. It is just a (fused) transformer in a case, and a plug attached to a cable that fits into the back of the Tom. Done 🙂

While waiting for my Polysix mod PCB, I am working on rev. 2 of my midi to cv interface. Rev 1 was working well, but I realized I wanted some more features.
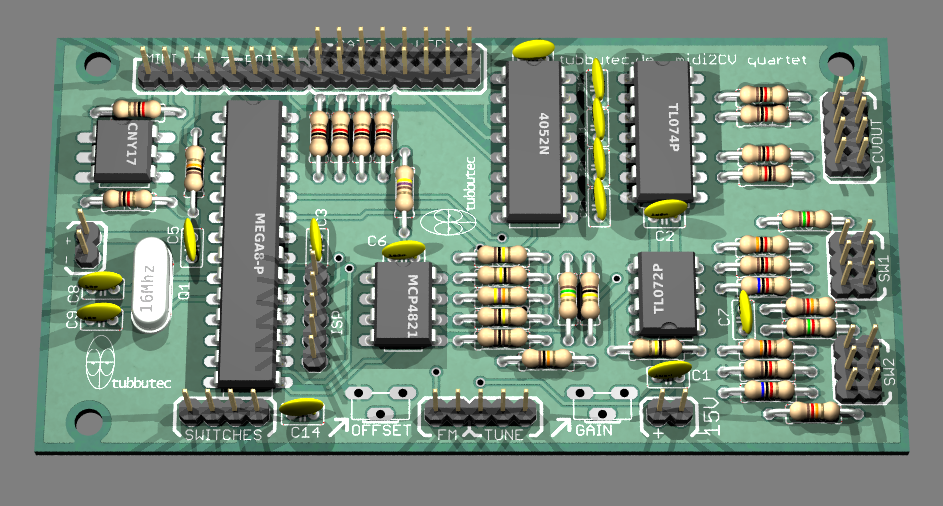
The new one will have:
This basically enables you to have 4x polyphony with a modular synthesizer !…..and much more 🙂
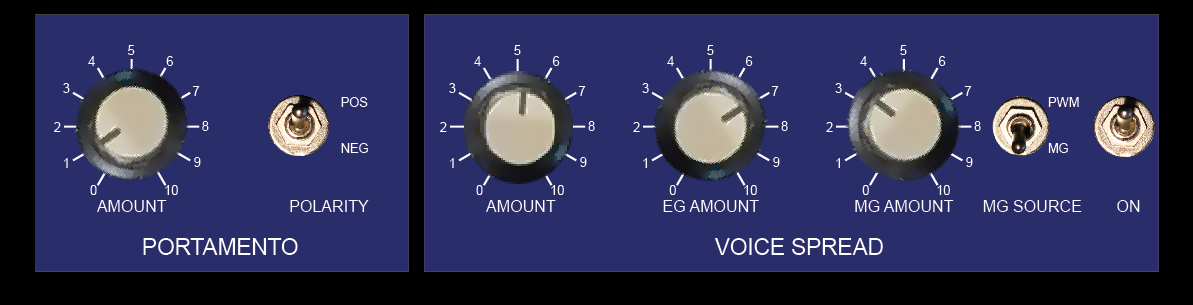
I am currently working on a PCB / kit for my Korg Polysix mod. It will be available soon and feature both mods: portamento and spread detune.
This is a design for a front panel – Polysix style:
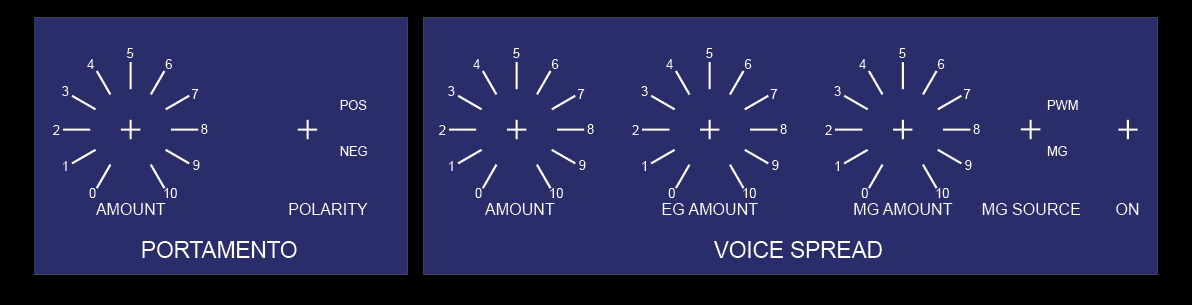
It could look like this:
And here is a rendering of the PCB:
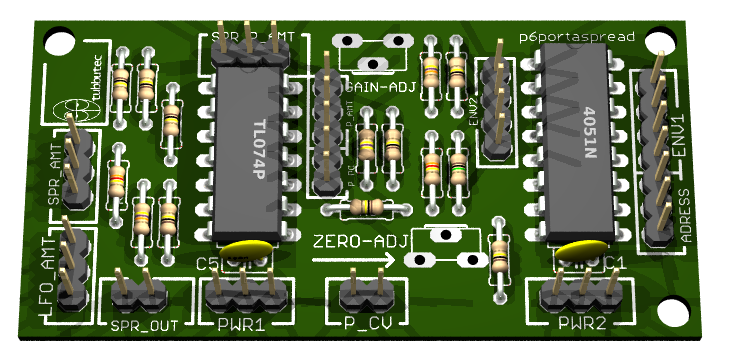
Currently a prototype board is being produced, for some last checks before a larger order of boards.
If you are interested, have any suggestions or questions, let me know in the comments 🙂
This was my the invitation to my 25th birthday some time ago…In form of a datasheet 🙂
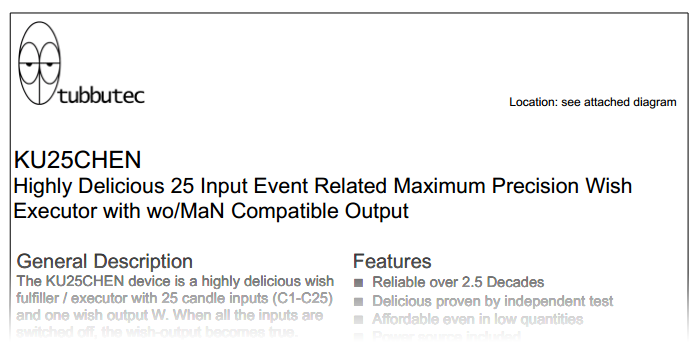
Full PDF here: KU25CHEN technical datasheet
or view PDF after the break….