Tubbutec Polysex – dev blog

Hi,

I thought I let you know what I’ve been doing since the last update. I worked a lot on my Polysix mod and will finally be able to sell it as a kit soon.

frontplatte4

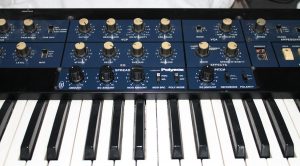
Tubbutec Polysex

What does the Polysex mod do?

There are some sound demos at the end of this article which should give you an impression, of some (but definitely not all) the new sounds which are achievable with this mod.

There are two different mods which can both be used at the same time:

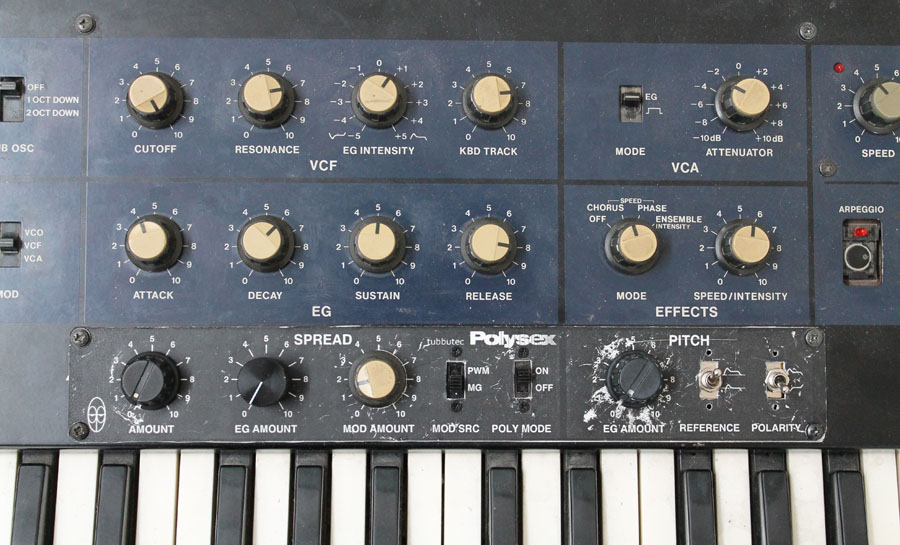
  • The pitch mod routes the envelope to the pitch. You can choose the polarity of the envelope and the reference point in the envelope where the pitch is not changed. This mod is very useful to create portamento like effects, brass instruments, percussive sounds and much more.
  • The second mod is the voice spread mod which is a very powerful tool. You can determine the amount of voice spread, route the envelope and one of two LFOs to it and switch voice spreading on and off in poly mode. This mod can be used to adjust and modulate the fatness of the sound in unison mode, in poly mode you can modulate how detuned the Polysix sounds. This can lead to more natural sounds, but can also be used to accomplish complex sound effects.

What will the kit include?

The kit will include a PCB, all necessary parts and a front panel which you can use to mount the controls onto your Polysix. The front panel is made of fully anodized and printed aluminum and done in Polysix style (see images above and below). Instead of original Polysix knobs the kit will only contain similar ones, but it is possible to use Polysix knobs (one can find used ones). There will be a version with the PCB fully assembled and tested,too.

panelproto

Prototype of the front panel made of plastic. I made this to check if everything fits as intended before having a large amount manufactured properly. The two switches on the right are not the final ones of course and as you can see I try a number of different knobs. The final version will be in Polysix style blue rather than grey.

Is it difficult to build?

No! The Polysex mod was designed as a kit, which means I tried to make it as easy as possible to assemble and install it. You will need basic soldering and metal work skills, but nothing you can’t learn by watching half an hour of a soldering tutorial on youtube. You will have to drill some holes into the metal casing of the Polysix, but precision is not needed because everything is covered by the front panel and will look very nice.

So why is it not already available? How long will it take? What are you doing the whole time?

At the moment I am working on collecting all the parts in larger quantities, getting the front panel and the PCBs produced, writing a manual and setting everything up nicely so you will get a good product and have a fun time 🙂

I have more questions!

Please don’t hesitate to ask them, I will answer and update this little FAQ.

Sound demos:

None of the sound examples make use of the effect section of the Polysix (or any external effects)


A simple arpeggio with mid attack and decay settings. The envelope to pitch amount is slowly increased to achieve a brass instrument like effect.


The whole Polysex mod is used in this example. A little bit of voice spread is set to achieve the sound of a slightly detuned synthesizer. Some more life is added by modulating the voice spread by the PWM LFO. Further more the envelope is routed to the pitch with the reference set to the sustain level and the polarity to negative, so that it pitches up as the sound decays.(The recording is a little bit distorted unfortunately)


Polysix in unison mode with the envelope routed to voice spread, long attack and release.
At first the reference is set to the sustain level, so the sound starts very dissonant, becomes more consonant and fat until it becomes a slowly phasing sound. As the key is released it reverses into dissonance.
The second time the reference is set to the zero level, the sound starts consonant, becomes dissonant and then consonant again.


An arpeggio in unsion mode. The voice spread amount is slowly increased – the sound becomes fatter and denser.


This sound demo uses voice spread modulated by the a fast PWM LFO.


Chords with long release and short attack, envelope routed to voice spread, with the sustain level as reference. As the chords decay, the sounds becomes more and more detuned. Sometimes the attack is set longer to achieve a sound that starts dissonant and increases in consonance.


The envelope is routed to the pitch to achieve a bass drum like percussive sound. The filter is modulated and different decay times and sustain levels are being set.

Polysix Mod PCB coming soon

I am currently working on a PCB / kit for my Korg  Polysix mod. It will be available soon and feature both mods: portamento and spread detune.

This is a design for a front panel – Polysix style:

p6moddesign

It could look like this:

p6moddesign2

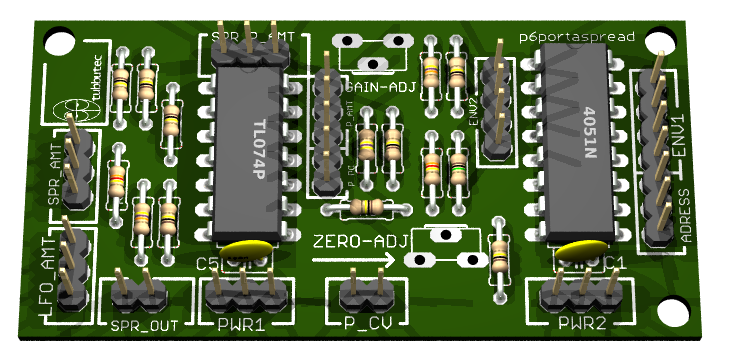
And here is a rendering of the PCB:

p6 spread detune pcb

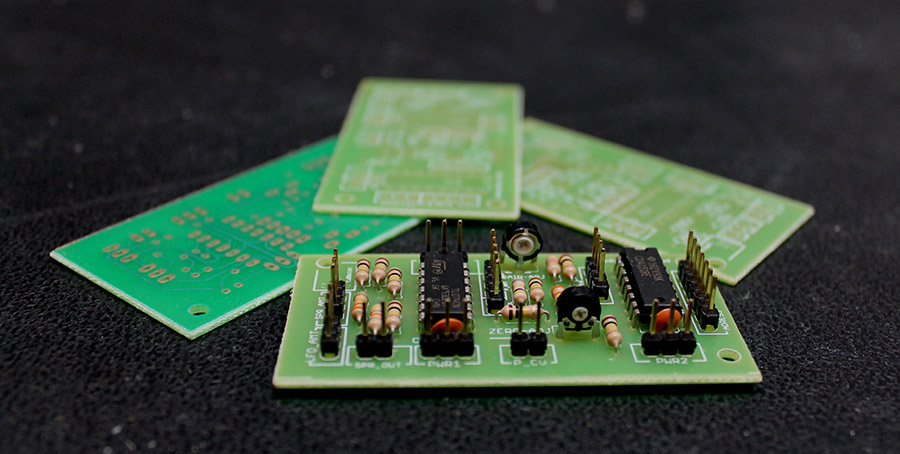
Currently a prototype board is being produced, for some last checks before a larger order of boards.

If you are interested, have any suggestions or questions, let me know in the comments 🙂

Adding output capability to a 10€ logic analyser

What is this?

I got myself one of these cheap USB logic analyses for about 10€. You can order these directly from china, free shipping, for example at dealextreme or aliexpress.

Unfortunately the hardware only supports digital input but not digital output even though the software does. But as it turns out you can add output capability with a nice small hack. This way you get a logic analyzer, a frequency generator, frequency counter, PWM generator, arbitrary digital signal generator,….! All in one.

The hardware of the LA basically consists of a CY7C6813A which handles the USB communication and a HC245 bidirectional bus driver. Yes bidirectional! A little debugging showed that the CY7C6813A as a matter of fact does output digital signals, when requested by software.

The only problem is, that the direction pin of the HC245 is hardwired to input mode.

Howto

You need:

  • A soldering iron with a small tip
  • A 10k resistor (or any other value between, let’s say 10k and 100k)
  • Some enamelled copper wire
  • A little switch
  • maybe some super glue

lamodboard

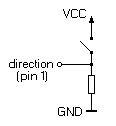
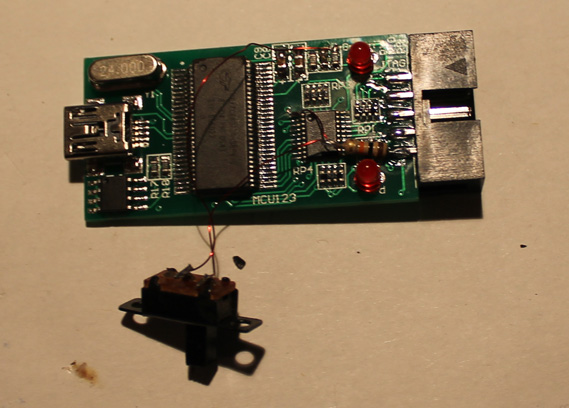
Take a knife or a scalpel and cut the trace marked in red. Solder the resistor to the contact marked as GND and use the enamelled copper wire to connect it to the pin which was connected to the trace you cut.

Take a small switch – I just took what I had lying around – and connect it to VCC and to the direction pin.
lamod

IMG_3429

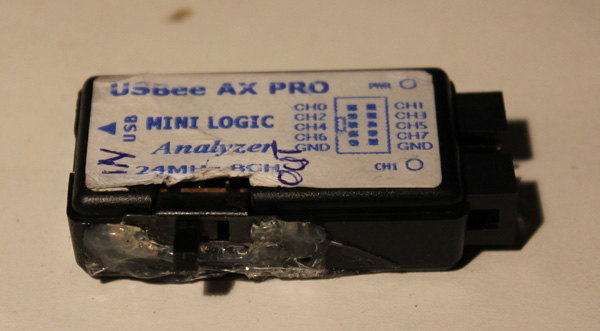
You can use the knive to cut an opening for the switch into the case and then use the super glue to glue it in. Done…

So now you can switch between input and output mode. Just be careful not to leave any outputs connected to the device when putting it into output mode.
lacase

(I used hot glue instead of super glue so it looks kind of ugly, but I don’t care 😉

This is a 1Mhz signal at the output:IMG_3431
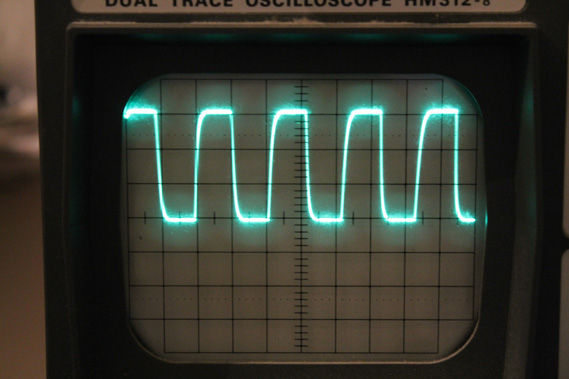
Have fun!!

There is a nice writeup about which software you can use on the ePanorama Blog

update: A lot of people (including myself) had problems with the USB cable that came with the LA. I couldn’t even charge my phone properly with it. So if you ever experience problems with high sample rates, glitches, etc, replace it.