Repairing a Novation Supernova with an overvoltage damage

This Novation Supernova just came in.

probably due to overvoltage on one of the outputs two of the outputs failed.

Which is actually really lucky, take a look at the damage!

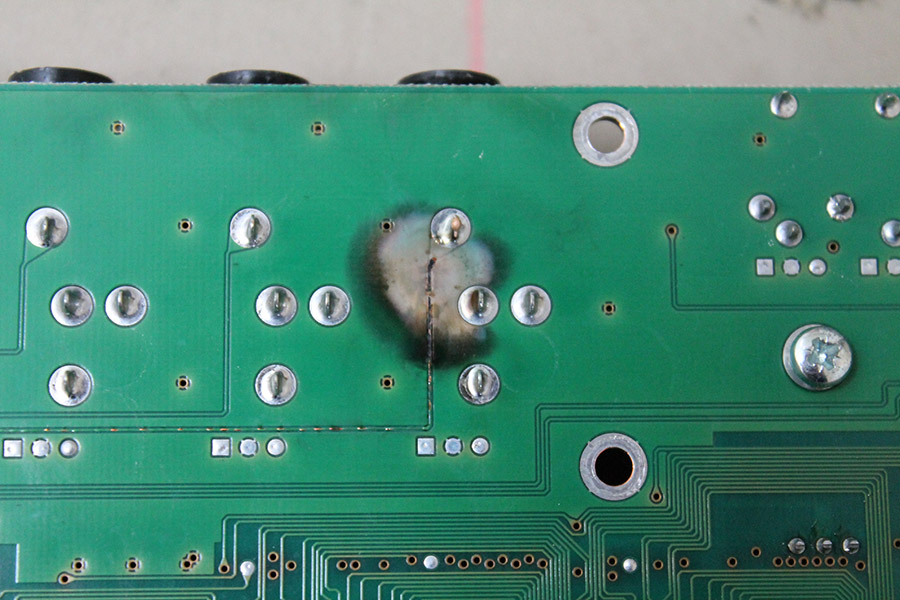
This is the bottom side of the PCB, the trace coming from the connector vaporized and you can see how much heat must have been there: A large area of the solder resist is gone too. If you look closely you can see, that the trace actually fused with the surrounding ground plane. I believe this is what saved the Supernova, because it protected the rest of the circuitry from the high voltage.

Novation Supernova (2)

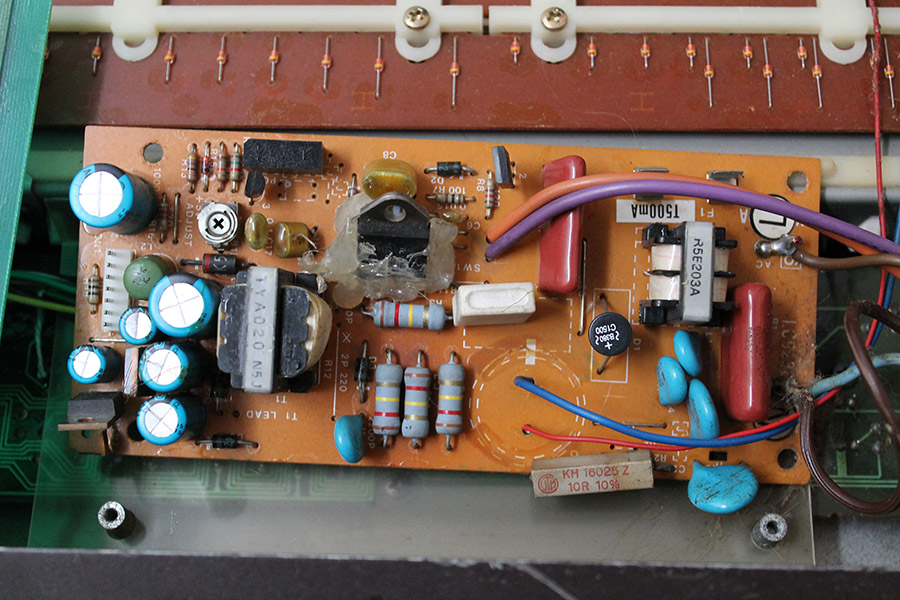
This is the other side. I already desoldered the connectors. As you can see there was a lot of heat here, too, the trace acted like a fuse and melted and the 47Ohms resistor exploded. Wow!

Novation Supernova (1)

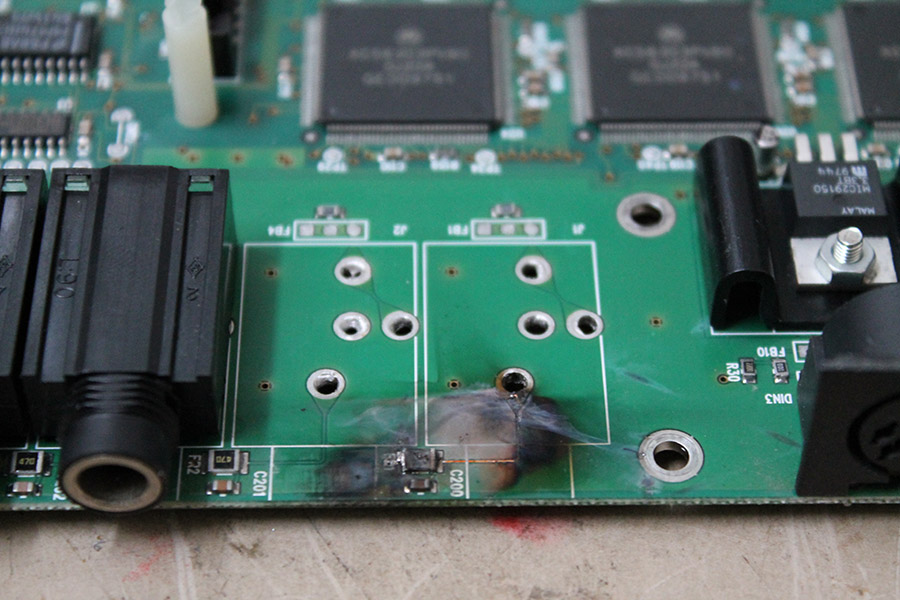
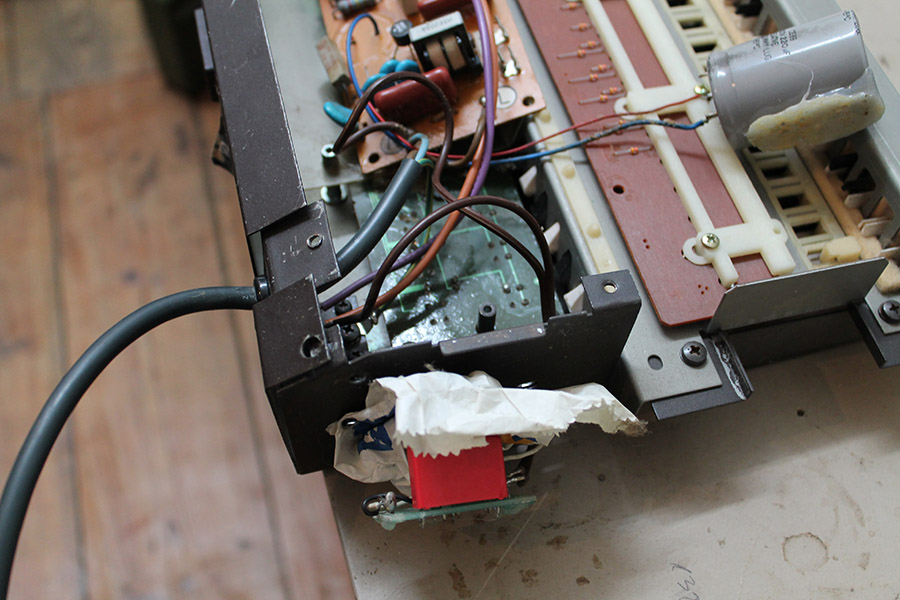
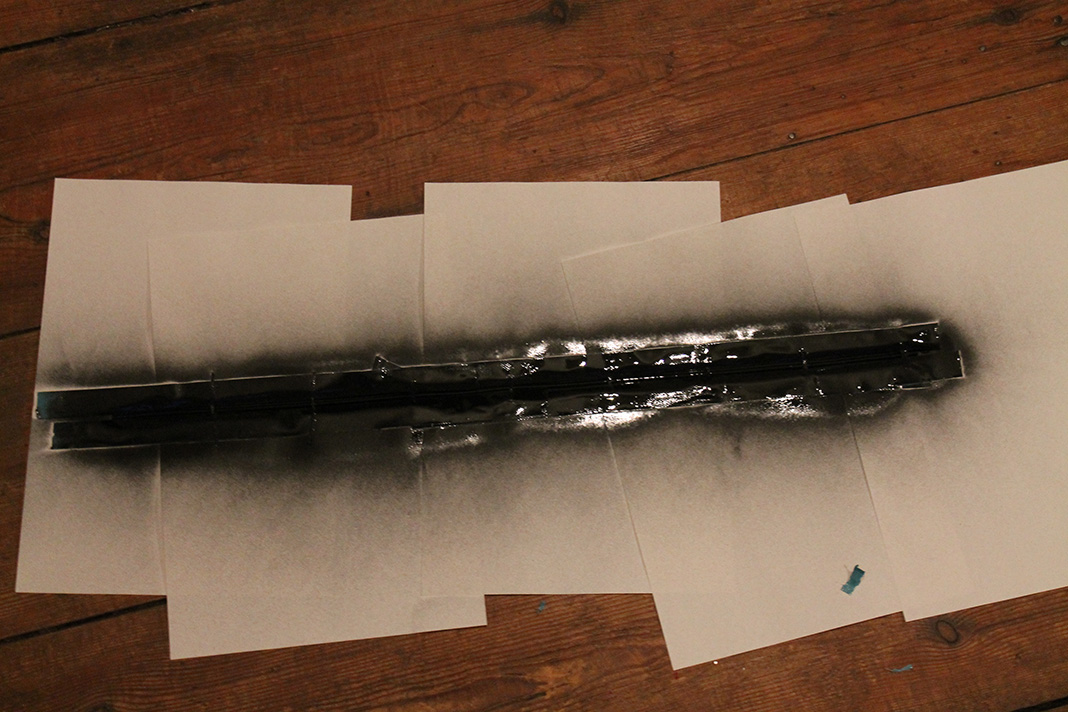
These are scorch marks on the metal enclosure which was about 1cm away from the PCB.

Novation Supernova (3)

Apart from that only some more resistors and an op-amp failed. Amazing when you consider what must have happened here!

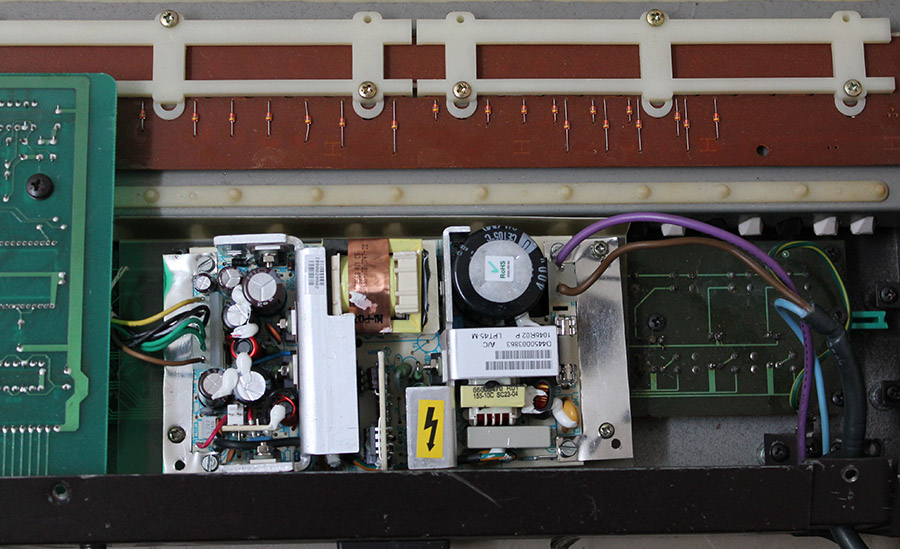
I replaced the broken SMD components, redid the broken traces and the two outputs are working again 🙂

Novation Supernova (8)

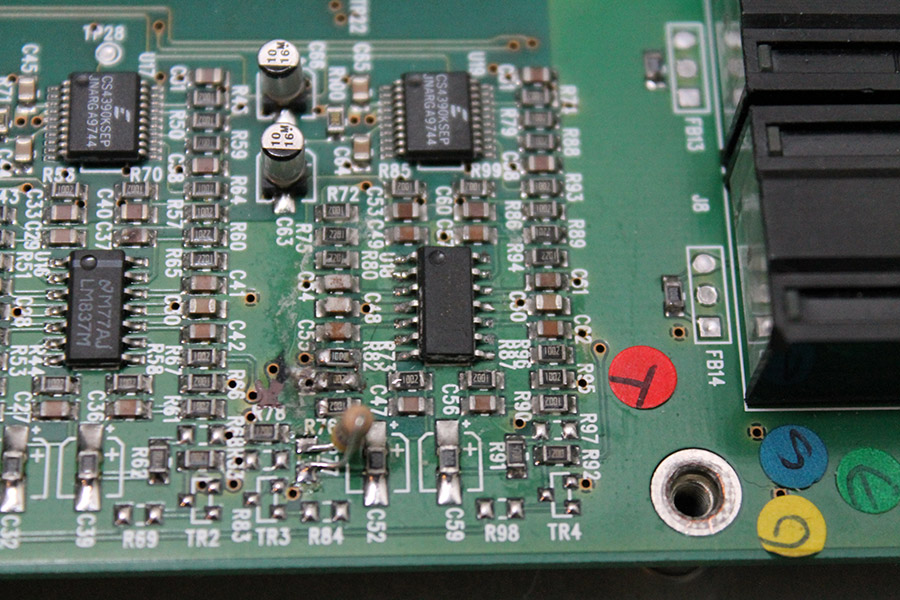
In the picture above you can see the replaced opamp and some replaced resistors. Unfortunately I didn’t notice a broken 740 ohms resistor before I ordered the parts. I used wired one instead, doesn’t look as nice, but works as well.


A new power supply for a Yamaha DX21

Look at this horrible “repair” job someone did to the power supply of this Yamaha DX21 (which broke again of course)

The main electrolytic capacitor has been replaced with just some other one, definitely not a low-ESR type, connected with quite long and thin leads and then glued into place somewhere in the case. The switching transistor is glued into place too and the traces leading to it are almost, but just not quite broken.Yamaha DX21 (3)

An additional power LED had been added, but instead of connecting it to the 5V rail, it is connected directly to 230V via an capacitive “led power supply”.

Yamaha DX21 (2)

Last but not least there is some strange sticky stuff all over the place, might be electrolyte from the capacitor, or some kind of glue that was used for something. It is hard to tell, it is an awful mess in there. Yamaha DX21 (1)

In cases like this instead of trying to fix the existing power supply it is better and cheaper to replace it with a new one.

Yamaha DX21 (4)


Repairing Yamaha DX100 keyboard

Yamaha DX100 (7)

So the story goes like this:

The previous owner in a desperate attempt to fix a partially broken keyboard managed to scrape of all the conductive material from the rubber strip.

Usually when I fix rubber pad based keyboards like this, it is usually enough to put some graphite spray on a Q-Tip and gently apply some of it to the pad. In this case none of the keys where working and even though the usual approach brought back some keys, it didn’t work very well. So I decided for a full renewal:

Yamaha DX100 (2) Yamaha DX100 (3)

Cover all parts of the rubber contacts that shouldn’t be conductive…Yamaha DX100 (4)

…use some nice graphite spray….Yamaha DX100 (5)

…woooo….Yamaha DX100 (6)

…and put it back in.

The Yamaha DX100 works again like a charm 🙂

Insert jacks

I just put insert jacks on my ‘things to check first’ – list. A couple of days ago I repaired a Soundcraft mixer, after disassembling it and figuring out the signal path (didn’t have schematics) it turned out that the contacts on the insert jacks were corroded disabling the signal flow.

The very same problem just occurred in an audio amplifier whose headphone jacket had the same problem leading to a defect left channel.

The importance of battery change in korg polysix synths

Picture by Cicciostoky

The Korg Polysix is a great Synthesizer and well known for its beautiful strings and pads and for its fat basslines (just to name a few possibilities). The effect unit features three independent delay lines which are modulated by a special kind of LFO with three sines 120° apart from each other.  The “ensemble” setting makes use of this possibility and creates a unique dense sound which you won’t find in any other comparable synthesizer.

It’s also possible to modify the Polysix a future article will probably cover the possibilities here.

Unfortunately more and more Polysix units end up broken, because the battery needed to keep the internal memory tends to leak when it get old. The battery acid destroys traces on the PCB, ICs and sometimes even the processor. It often takes a long while to replace the broken parts and restore the broken traces.I already repaired three Polysix’s with this problem and one of these was actually a total loss, because repairing would have cost more than the price of a new Polysix (that was a few years ago when a P6 was about 200€).  (btw. I repaired it nevertheless, I just love these synths^^)

so please:  If your Polysix still has the original battery please change it or get it changed!!

It is a standard procedure and costs about 30€,…or you just do it yourself. Old Crow has a detailed how to.

It is a real shame with every Polysix that is broken beyond repair.

The picture shows some fixed traces in a Polysix, luckily this unit  was not destroyed badly and it was possible to fix it quite fast.