
ModyPoly for Poly-61M
This is a quick manual how to install the ModyPoly in an Korg Poly-61M. The existing midi sockets are used, so no new holes have to be drilled. Incomming midi messages are passed to both the original midi implementation and the ModyPoly. Outgoing midi messages will be from ModyPoly only.
Juno-66 and ModyPoly out of stock
We are currently producing a new batch of ModyPoly and Juno-66.
You can pre order now, we will ship as soon as possible.
Will most likely ship not later then mid-May
Superbooth 2017
Currently preparing for Superbooth 2017, hope to see you there!
We are at booth 0305 on the second floor.

Korg MiniPops 120 uniPulse installation

Here is how to add velocity sensitive midi input to a Korg Minipops 120 using the uniPulse.
Check Minipops-120 Single Outputs for information on how to add single outputs.
MiniPops 120P – the portable version of the MiniPops 120
There is a portable version of the MiniPops 120. While electronically identical to the normal version there are mechanical differences. Hence you`ll find details on how to install Unipulse in this PDF:
CR-5000 / CR-8000 trigger points for uniPulse
This is how to install the uniPulse in a CR-5000 or CR-8000.
Update: User ‘a.d.a.m.baby’ on MuffWiggler found some great additions to this manual.
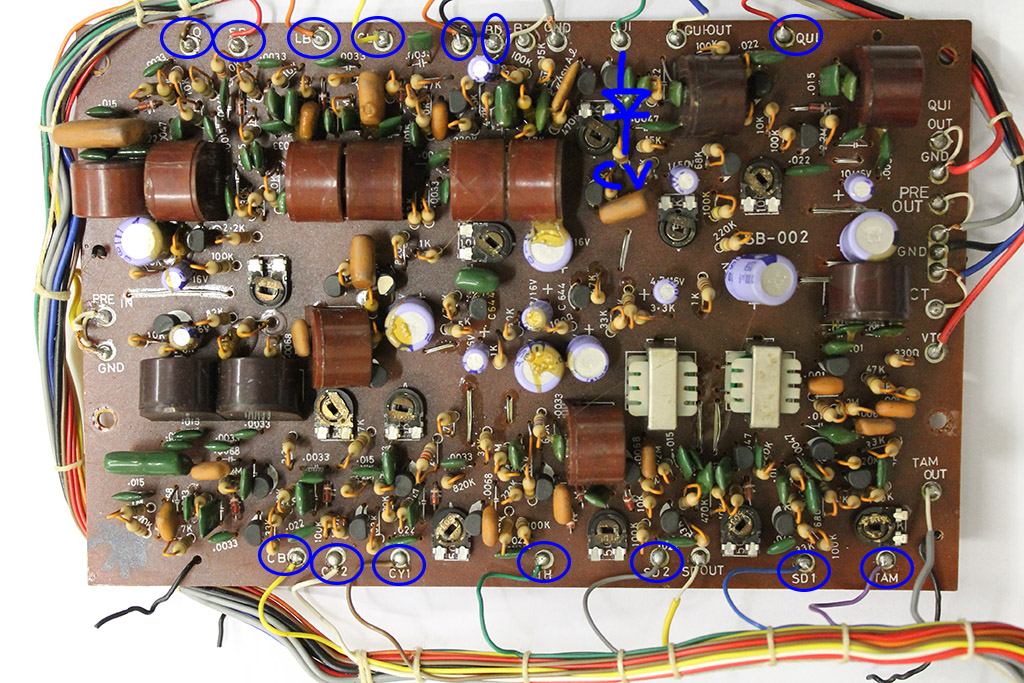
Here are the schematics and pictures with trigger points. Points in blue must be triggered with a negative voltage, points in red with a positive one. You can connect the uniPulse trigger outputs directly to these points. Use the configuration program to program the behaviour and polarity of the trigger outputs. Trigger points can be found on the bottom of this post.
Here is the schematic with the trigger points.

On the next picture you will see the whole CR-8000 voiceboard with the cables connected to each trigger point. Open the picture (download it) and zoom in to see where exactly the trigger points are. P9 is not used, please ignore!
If you want to trigger the Accent, solder the cable from D3 to a 1k Resistor and a Diode (1N4148 or similar; Polarity like shown in the picture) and the other end of the diode to the trigger point. In the config file provided accent is triggered via a midi note. If you prefer accent to be triggered if velocity is at 127, you can configure D3 as ‘Accent’ in the config tool.
They are labeled P1 to P16 corresponding to the uniPulse trigger outputs and colors.

Connect the brown Vin cable from UniPulse to the left leg of C22
Midi sync CR-5000
In order to add midi sync to the 5000 you need to cut the two traces coming from IC15 as shown in the schematics below. You then add a two pole switch and connect it to two digital outs of the uniPulse. Configure the outputs as clock and start/stop. You can now use the switch to change between internal and midi clock.

There is another method to install Midi Sync on a CR-5000, as pointed out by a user. We don´t know if this is true for all CR-5000s, but the machine of the user has jumper wires installed which can easily be desoldered and the switch can be installed in their locations. The solder points closest to the CPU go to the middle pins of the switch.


The user also pointed out that the Sync Gate (the D1 line from Unipulse) needs to be inverted. We don´t have a CR-5000 at hand, so we couldn´t check this. You can just try that if you´re having trouble when using the provided config file. Just invert the signal in the Tubbutec Unipulse Configurator software and upload it to Unipulse.

Midi sync CR-8000
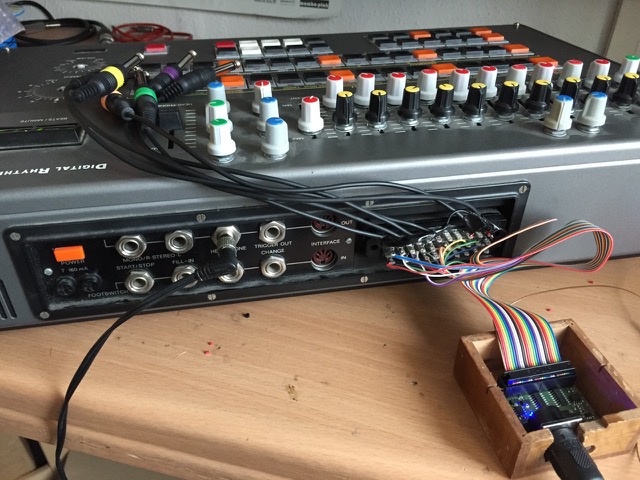
For the CR-8000 sync is very easy to install as it has a din-sync input. Just connect two digital outs of the uniPulse to the DIN-SYNC start and clock lines and configure the outputs with the configuration program.
You don’t even have to drill a hole for the midi socket – you can use the existing dinsync socket without losing its functionality because pins 4 and 5 are not used.
MIDI and DIN Sync
Solder a 47k Resistor between D1 and the cable running to the DIN-Connector, do the same for D2. (if you put the uniPulse to the same position we did, the cables from the uniPulse may not be long enough, thats why the cables have a different color on the DIN-socket) See attached pictures.
![]()

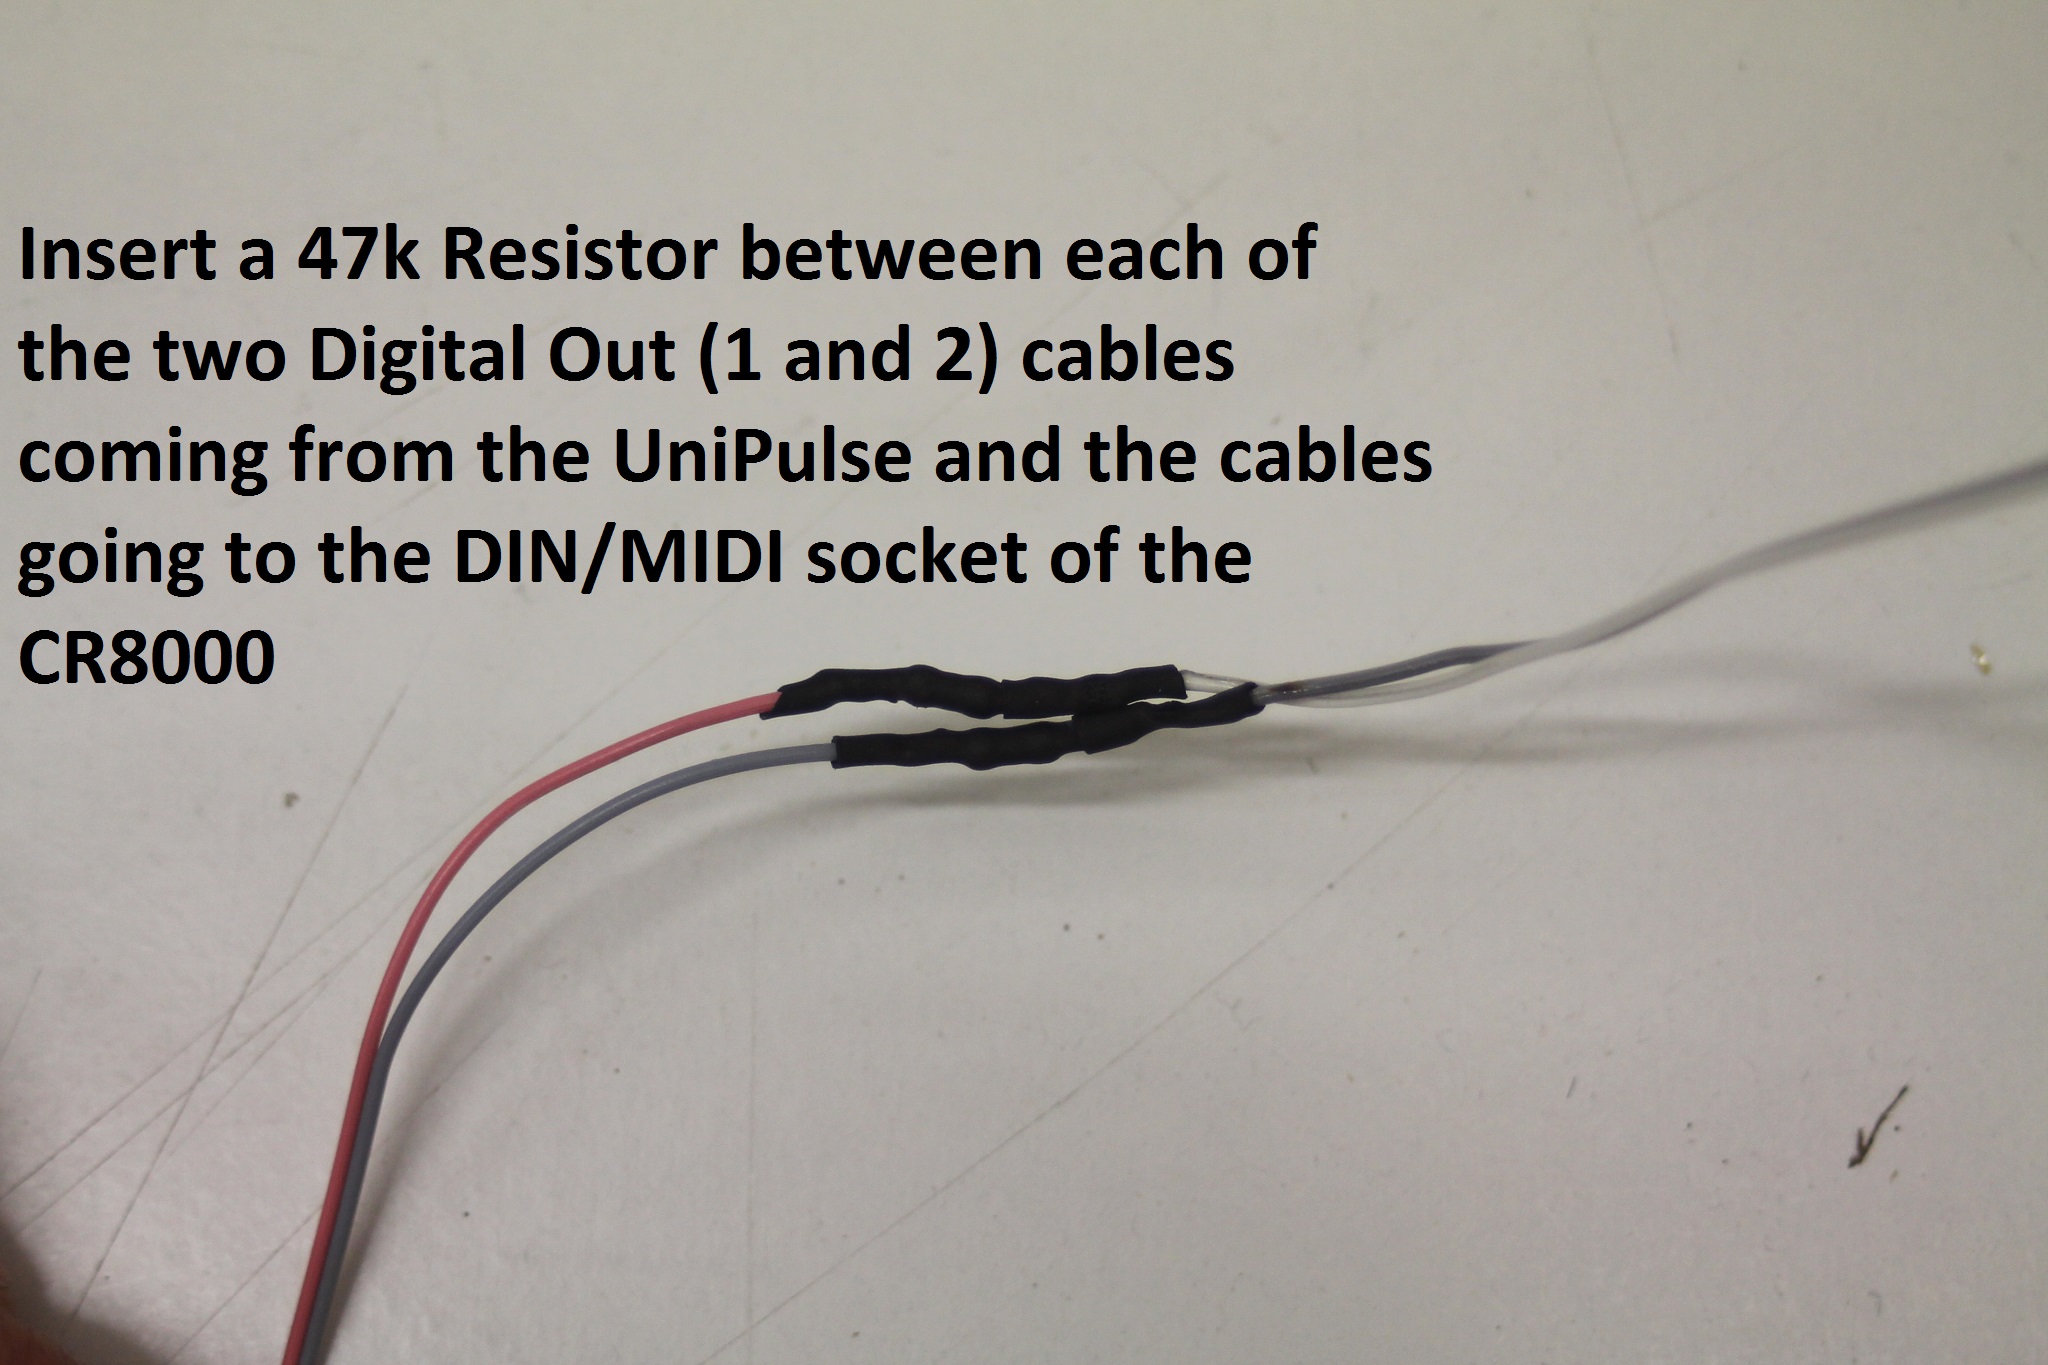
You need to cut the wires from the MIDI-connector provided with uniPulse. Solder the cables the same way they were to the DIN-Connector of the CR-8000. See again the picture above.
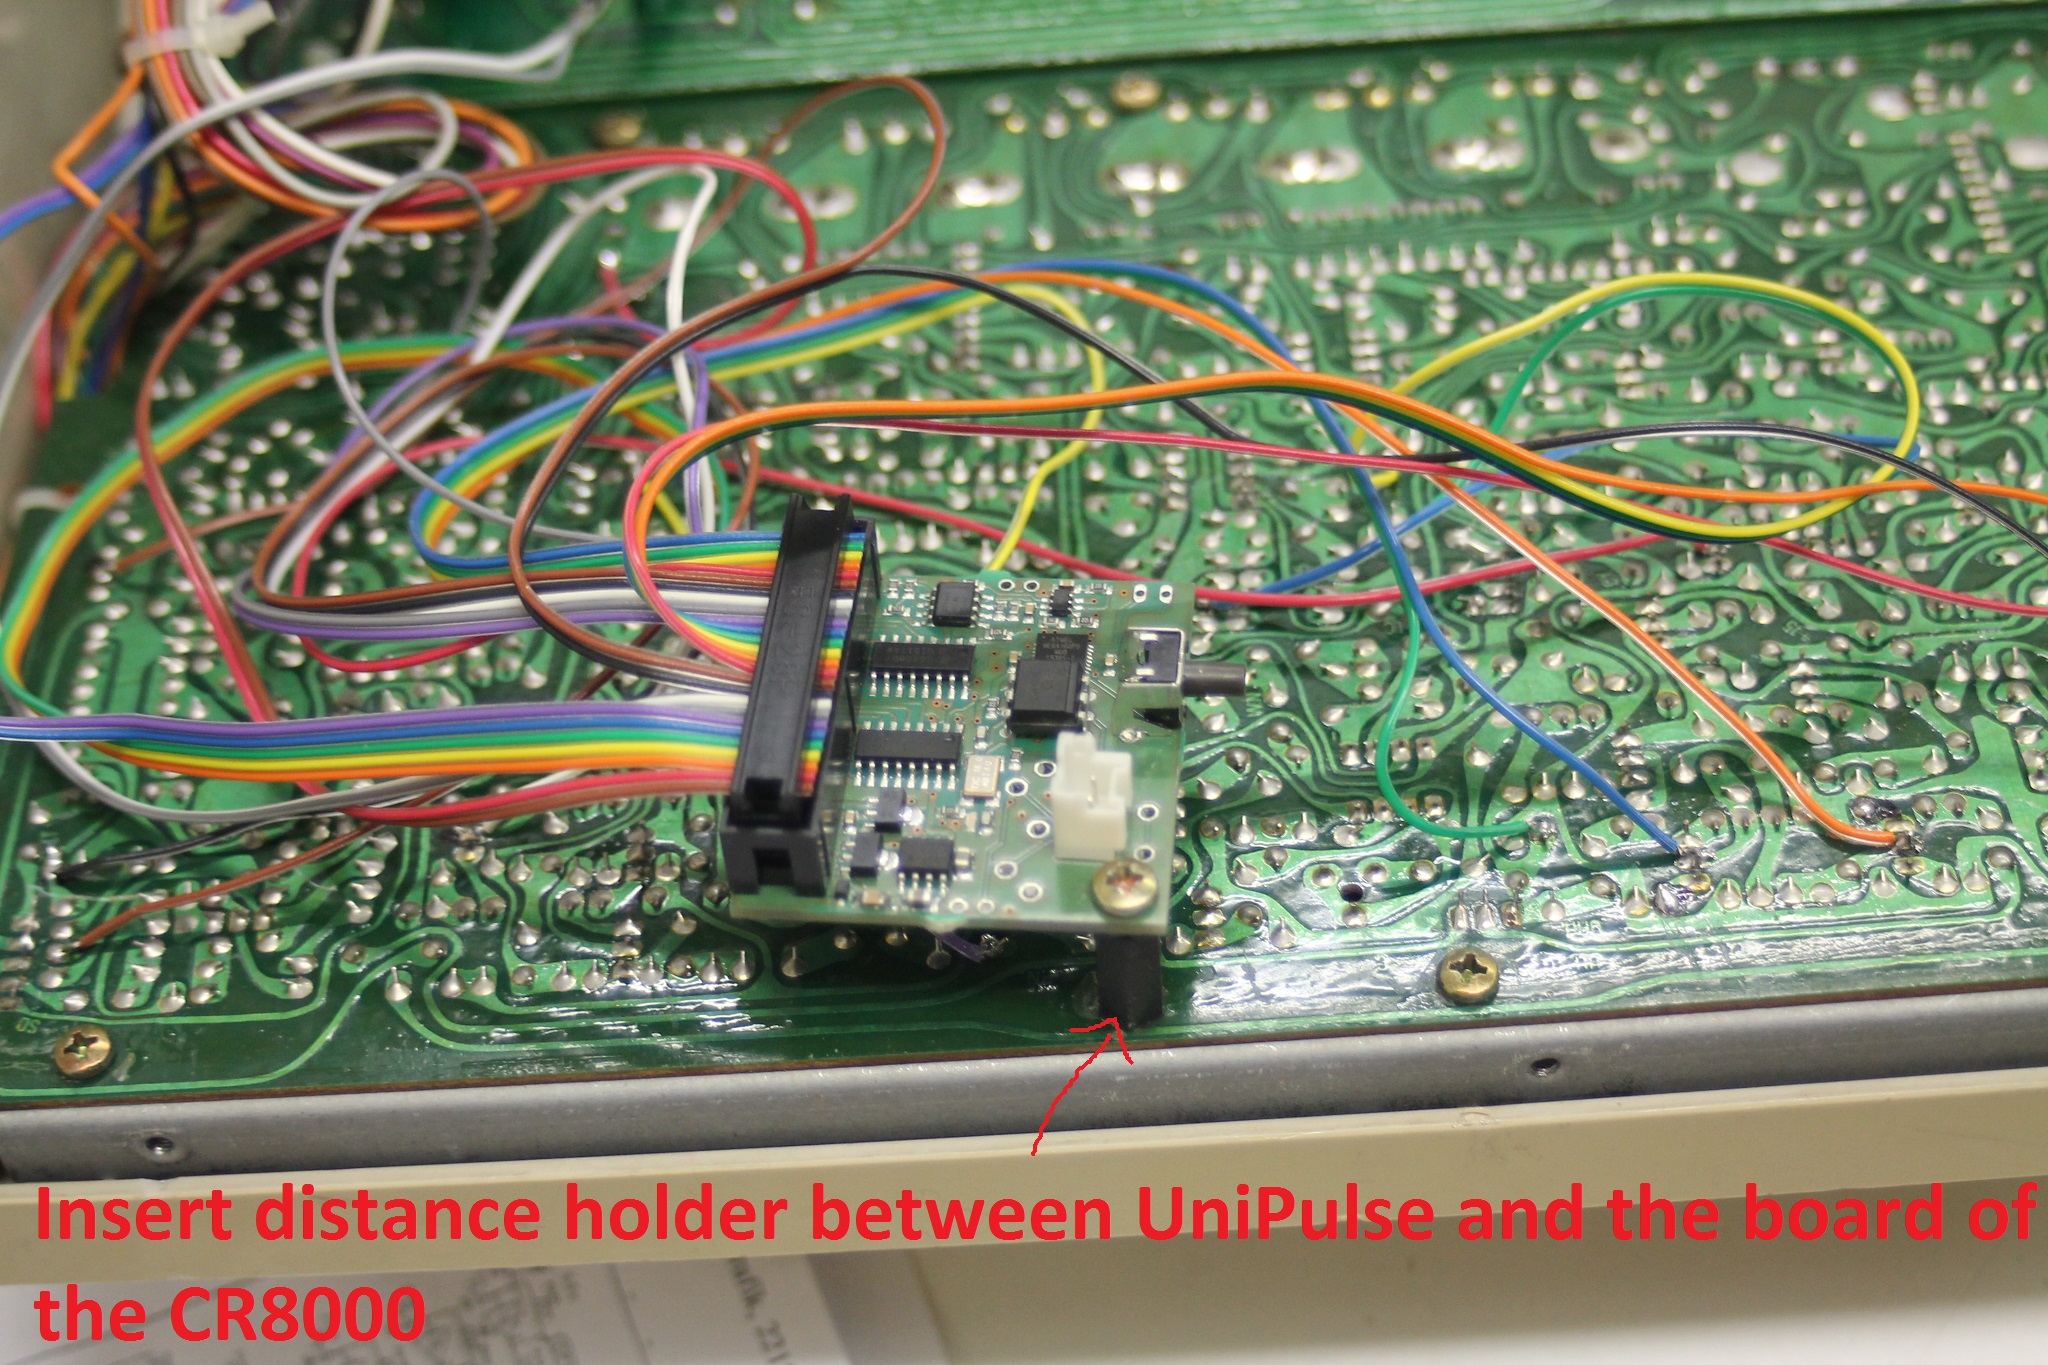
Now you can put the uniPulse in place. Use a distance holder screw. You can also find a different place to put the uniPulse if you like.
Finally you only need to upload the CR-8000 / CR-5000 config file to the uniPulse and you are ready to rock!
Midi for Vermona DRM (1987) with UniPulse
Jacob Korn was kind enough to share his documentation of adding midi to the classic Vermona DRM drum machine using the Tubbutec UniPulse interface.
Why would you use the uniPulse for a machine that already has midi? According to Jacob the DRMs original midi has severe timing issues and with the uniPulse it is much tighter.
Midi for Korg Minipops 7 (uniPulse installation)
This guide shows you how to use the Tubbutec uniPulse interface with a Korg Minipops 7. You can also add outputs for each instrument.
The config file for the Korg Minipops 7 is here.
Features:
– Full velocity control for all 14 instruments
– Velocity controls guiro pitch
– Midi sync (optional)
Guiro pitch is controlled by midi velocity. If you want a fixed pitch, adjust CV-voltage until the desired pitch is reached.
These are the midi notes to trigger the instruments when using our config file. You can of course change these notes using the uniPulse configurator.
- Note 64: Conga
- Note 60: SB
- Note 61: LB
- Note 75: CL
- Note 37: RS
- Note 36: BD
- Note 82: QUI
- Note 54: TAM
- Note 38: SD1
- Note 40: SD2
- Note 42: HH
- Note 49: CY1
- Note 51:CY2
- Note 56: CB
- Note 74: Guiro, velocity controls pich
Trigger points:
The image below shows the trigger points. You can solder the uniPulse trigger outs directly to these points. An exception is the Guiro, which is connected to the uniPulse CV-out with an additional diode.
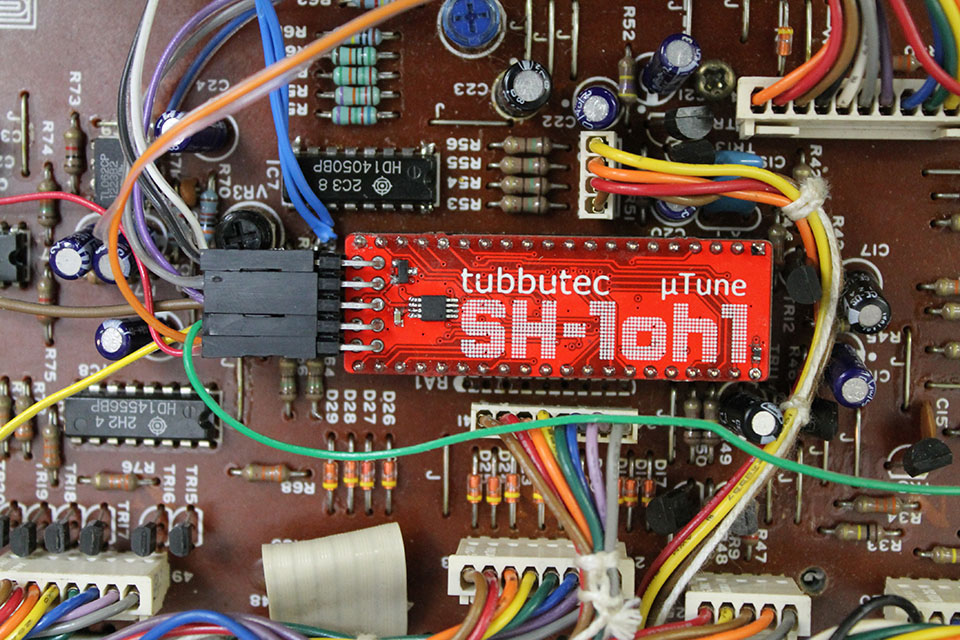
SH-1oh1 µTune edition now available

The SH-1oh1 µTune is a special edition of the Tubbutec SH-1oh1. It has all the features of the SH-1oh1 but also:
- Microtuning with high resolution
- Upload up to 31 custom scales via midi sysex. For example using Scala.
- Switch scales live
- Includes a scale editor! For each key you can set base note, coarse and fine pitch via midi CC. Save your custom scale when satisfied.
- Export scales via midi-sysex, or send them to other synths
- Custom tuning available on CV-out (5 octaves only)
The SH-1oh1 µTune special edition is hand assembled and tested in our workshop.
The user manual can be found here: SH-1oh1 µTune user manual (PDF) (Chapter 8 describes µTune features)
The installation manual can be found here: SH-1oh1 µTune installation manual (PDF)
You can order the SH-1oh1 µTune in our shop.
Polysex now open source hardware
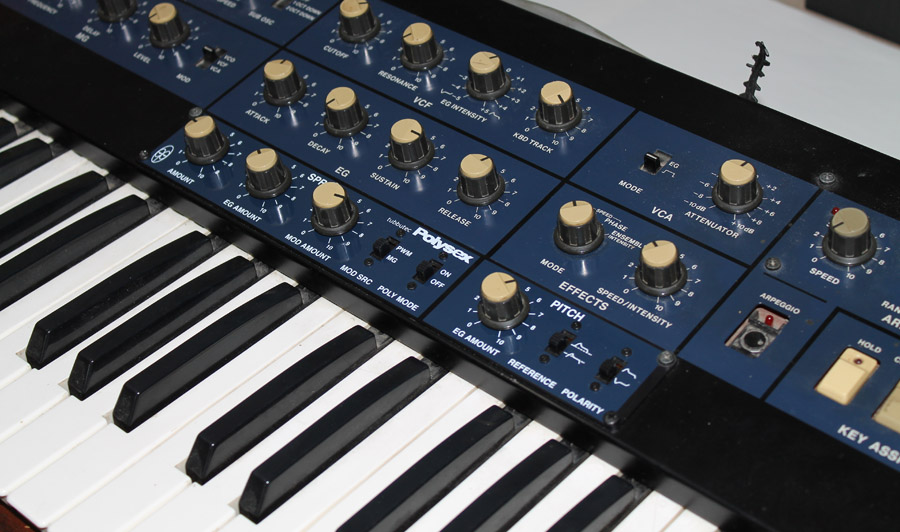
Tubbutec Polysex is discontinued but we decided to make all the design files available to the public as open hardware. You can still purchase the PCBs in our shop.
The files include front panel mechanical drawings and print data, schematics and PCB layout, the mechanical stencil design and manuals.
If you use or modify this, please be so kind and leave a comment below. We also like pictures and videos 🙂
You can download the files as .ZIP here: Tubbutec Polysex design files.
Files are licensed under the CERN OHL v. 1.2.