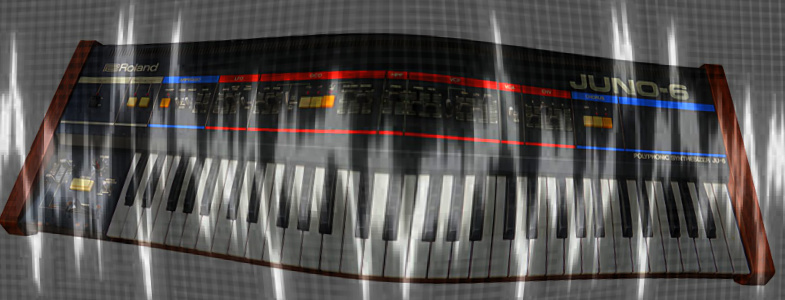
Improving Juno-6 and Juno-60 noise

Here are some investigations and improvements on the Juno-6 and Juno-60 noise performance. We looked at both, the original CPU as well as our Juno-66 upgrade

Both, the original CPU and Juno-66 create noise on the output. You can hear that by not playing anything on the keyboard, select SAW as input waveform (as this seems to reduce the VCA bleeding) and pull the gain all the way up.
The noise performance can be improved by adding additional filtering to the 5V supply. In case of the SH-101 for example which has a similar problem, an additional 10µF ceramic cap close to the CPU worked very well.

Now, at least in the case of my Juno, the original CPU has actually a much louder noise ( I assume because it draws more current), as compared to Juno-66.
However, the noise is not focused on one frequency, but a broader spectrum. This is due to jitter in the original CPU processing.

Juno-66 on the other hand, produces noise with a dominant frequency content and hence might be more audible – even though actually quieter.

To rectify this, I have created a firmware update that introduces additional jitter to broaden the spectrum a bit. Note, however that a good solution would of course eliminate the noise via supply rail filtering.

Noise of the original CPU, while a key is pressed the frequency is a bit different.

With the same settings: Juno-66 firmware 1.29. I press keys and change the portamento switch. Note, that this is already quieter than the original CPU

Same setting: Juno-66 firmware 1.3 – jitter is introduced

Soldering an additional 10uF capacitor between GND and 5V on the bottom of the board across the CPU supply pins, improved the noise even further.

You can find the 1.30 firmware on the updater site.

Midi for Kawai SX-210 with OrganDonor

Overview

The Kawai SX-210 version of OrganDonor offers the following features:

  • Fully polyphonic midi input for all 61 Notes
  • Optional learn button to set midi channel.

Installation

The installation is relatively simple, but does require basic soldering skills. You will need to drill a hole for the midi socket.
Installation instructions can be found in this PDF.

User guide

Setting midi channel and keyboard offset

If the optional learn button is installed, it can be used to quickly change the midi receive channel of organDonor.

Connect midi out of a computer or keyboard to midi in of organDonor. Make sure not to send any notes.
Press the learn button and while it is pressed send a midi note on any midi channel. organDonor will set this note as the lowest note of the synthesizer and use its midi channel. These settings are saved.

Playing notes

Send midi notes on the configured midi channel (see above)

More configuration

Alternatively you may configure a lot of parameters using our organDonor configurator.
We recommend using the Kawai SX-210 config file as starting point
1.) Save the file on your hard drive via right click -> save as
2.) in the configurator press “Load configuration” and select the file

Korg Mini Pops 45 MIDI with uniPulse

This manual shows how to install uniPulse in a Korg Mini Pops 45 and trigger all 10 instruments via Midi.

The installation is fairly simple and only requires soldering a few wires and parts into place, as well as drilling a hole for the midi socket.

Trigger connections

Here we see the 10 trigger points for the various instruments. These are trigger outputs P1-P10 from uniPulse directly soldered to the trigger points.

In order to power the uniPulse you just need to solder the brown (V+) and red (GND) wires to the electrolytic capacitor shown in the picture.

Installing the midi socket

Installing the midi socket is simple. A drill guide is included in the kit. Any location is fine, we chose to install the socket next to the audio sockets.

Config file upload

After installing uniPulse, turn on the machine and make sure the LED on the uniPulse is turned on. This means it has power and is running.
Connect midi and use the config tool to upload the following configuration.

Config file (right click, save as)

have fun!


Midi for Roland RS-09 with OrganDonor

Overview

The Roland RS-09 version of OrganDonor offers the following features:

  • Fully polyphonic midi input for all 44 Notes
  • Optional learn button to set midi channel.

Installation

The installation is relatively simple, but does require basic soldering skills. You will need to drill a hole for the midi socket.
Installation instructions can be found in this PDF.

User guide

Setting midi channel and keyboard offset

If the optional learn button is installed, it can be used to quickly change the midi receive channel of organDonor.

Connect midi out of a computer or keyboard to midi in of organDonor. Make sure not to send any notes.
Press the learn button and while it is pressed send a midi note on any midi channel. organDonor will set this note as the lowest note of the synthesizer and use its midi channel. These settings are saved.

Playing notes

Send midi notes on the configured midi channel (see above)

More configuration

Alternatively you may configure a lot of parameters using our organDonor configurator.
We recommend using the Roland RS-09 config file as starting point
1.) Save the file on your hard drive via right click -> save as
2.) in the configurator press “Load configuration” and select the file

Midi for Crumar Performer with OrganDonor

Overview

The Crumar Performer version of OrganDonor offers the following features:

  • Fully polyphonic midi input for all 49 Notes
  • Optional learn button to set midi channel.

Installation

The installation is relatively simple, but does require basic soldering skills. You will need to drill a hole for the midi socket.
Installation instructions can be found in this PDF.

User guide

Setting midi channel and keyboard offset

If the optional learn button is installed, it can be used to quickly change the midi receive channel of organDonor.

Connect midi out of a computer or keyboard to midi in of organDonor. Make sure not to send any notes.
Press the learn button and while it is pressed send a midi note on any midi channel. organDonor will set this note as the lowest note of the synthesizer and use its midi channel. These settings are saved.

Playing notes

Send midi notes on the configured midi channel (see above)

More configuration

Alternatively you may configure a lot of parameters using our organDonor configurator.
We recommend using the Crumar Performer config file as starting point
1.) Save the file on your hard drive via right click -> save as
2.) in the configurator press “Load configuration” and select the file

Midi for Roland RS-101 with OrganDonor

We have not had the chance yet to build our OrganDonor midi interface into a RS-101. However, we did install one in a RS-202 and – according to the schematics and a single picture found on the web – they seem to be identical when it comes to the tone generator/gate board.

This means it should be relatively straight forward to use the RS-202 installation manual and apply it to the RS-101.

If you want to try, we will of course assist. You can also contact us and send some pictures of the inside of your RS-101. We’ll be happy to help.

Midi for Yamaha SS-30 with OrganDonor

Overview

The Yamaha SS-30 version of organDonor offers the following features:

  • Fully polyphonic midi input for all 49 Notes
  • Optional learn button to set midi channel.

Installation

The installation is relatively simple, but does require basic soldering skills. You will need to drill a hole for the midi socket.
Installation instructions can be found in this PDF.

User guide

Setting midi channel and keyboard offset

If the optional learn button is installed, it can be used to quickly change the midi receive channel of organDonor.

Connect midi out of a computer or keyboard to midi in of organDonor. Make sure not to send any notes.
Press the learn button and while it is pressed send a midi note on any midi channel. organDonor will set this note as the lowest note of the synthesizer and use its midi channel. These settings are saved.

Playing notes

Send midi notes on the configured midi channel (see above)

More configuration

Alternatively you may configure a lot of parameters using our organDonor configurator.
We recommend using the Yamaha SS-30 config file as starting point
1.) Save the file on your hard drive via right click -> save as
2.) in the configurator press “Load configuration” and select the file

Eminent / ARP Solina String Ensemble

Overview

The Solina String Ensemble version of organDonor offers the following features:

  • Fully polyphonic midi input for all 49 Notes
  • Optional independent control of the 20 “Bass notes”
  • Optional learn button to set midi channel.

Installation

The installation is relatively simple, but does require basic soldering skills. You will need to drill a hole for the midi socket.
Installation instructions can be found in this PDF.

User guide

Setting midi channel and keyboard offset

If the optional learn button is installed, it can be used to quickly change the midi receive channel of organDonor.

Connect midi out of a computer or keyboard to midi in of organDonor. Make sure not to send any notes.
Press the learn button and while it is pressed send a midi note on any midi channel. organDonor will set this note as the lowest note of the synthesizer and use its midi channel. These settings are saved.

By default the “normal” notes are playing on midi channel 1 and the “bass” notes on midi channel 2. Setting the “normal” midi channel to channel 2 as well (using the learn button), will result in the original behaviour – as if playing on the keyboard.
Instead of using the learn button, the midi channels can also be configured via the configurator (see below).

Playing notes

Send midi notes on the configured midi channel (see above)

More configuration

Alternatively you may configure a lot of parameters using our organDonor configurator.
We recommend using the Solina String Ensemble config file as starting point
1.) Save the file on your hard drive via right click -> save as
2.) in the configurator press “Load configuration” and select the file

Midi for Yamaha SK-10

Overview

The Yamaha SK version of organDonor offers the following features:

  • Fully polyphonic midi input for all 49 notes
  • Optional learn button to set midi channel.

Installation

The installation is relatively simple, but does require basic soldering skills. You will need to drill a hole for the midi socket.
Installation instructions can be found in this PDF.

User guide

Setting midi channel

If the optional learn button is installed, it can be used to quickly change the midi receive channel of organDonor.

Connect midi out of a computer or keyboard to midi in of organDonor. Make sure not to send any notes.
Press the learn button and while it is pressed send a midi note on any midi channel. organDonor will set this note as the lowest note of the synthesizer and use its midi channel. These settings are saved.

Playing notes

Send midi notes on the configured midi channel (see above)

More configuration

Alternatively you may configure a lot of parameters using our organDonor configurator.
We recommend using the SK-10 config file as starting point
1.) Save the file on your hard drive via right click -> save as
2.) in the configurator press “Load configuration” and select the file