This guide explains how to install a MIDI input in a Casio MT-90 keyboard. We use uniMatrix to interface the keyboard matrix and simulate key presses.
It is also possible to change instruments via MIDI program change messages and to select rhythms via MIDI CC.
ProgCh 0: Piano
ProgCh 1: Elec Piano
ProgCh 2: Organ
ProgCh 3: Oboe
ProgCh 4: Clarinet
ProgCh 5: Vibraphone
ProgCh 6: String
ProgCh 7: Elec Organ
CC 7: Rock
CC 8: Swing
CC 9: Walz
CC 10: Bossa Nova
CC 11: Slow Rock
CC 66: Sustain
CC 67: Casio Chord
CC 68: Start
CC 69: Stop
Installing uniMatrix
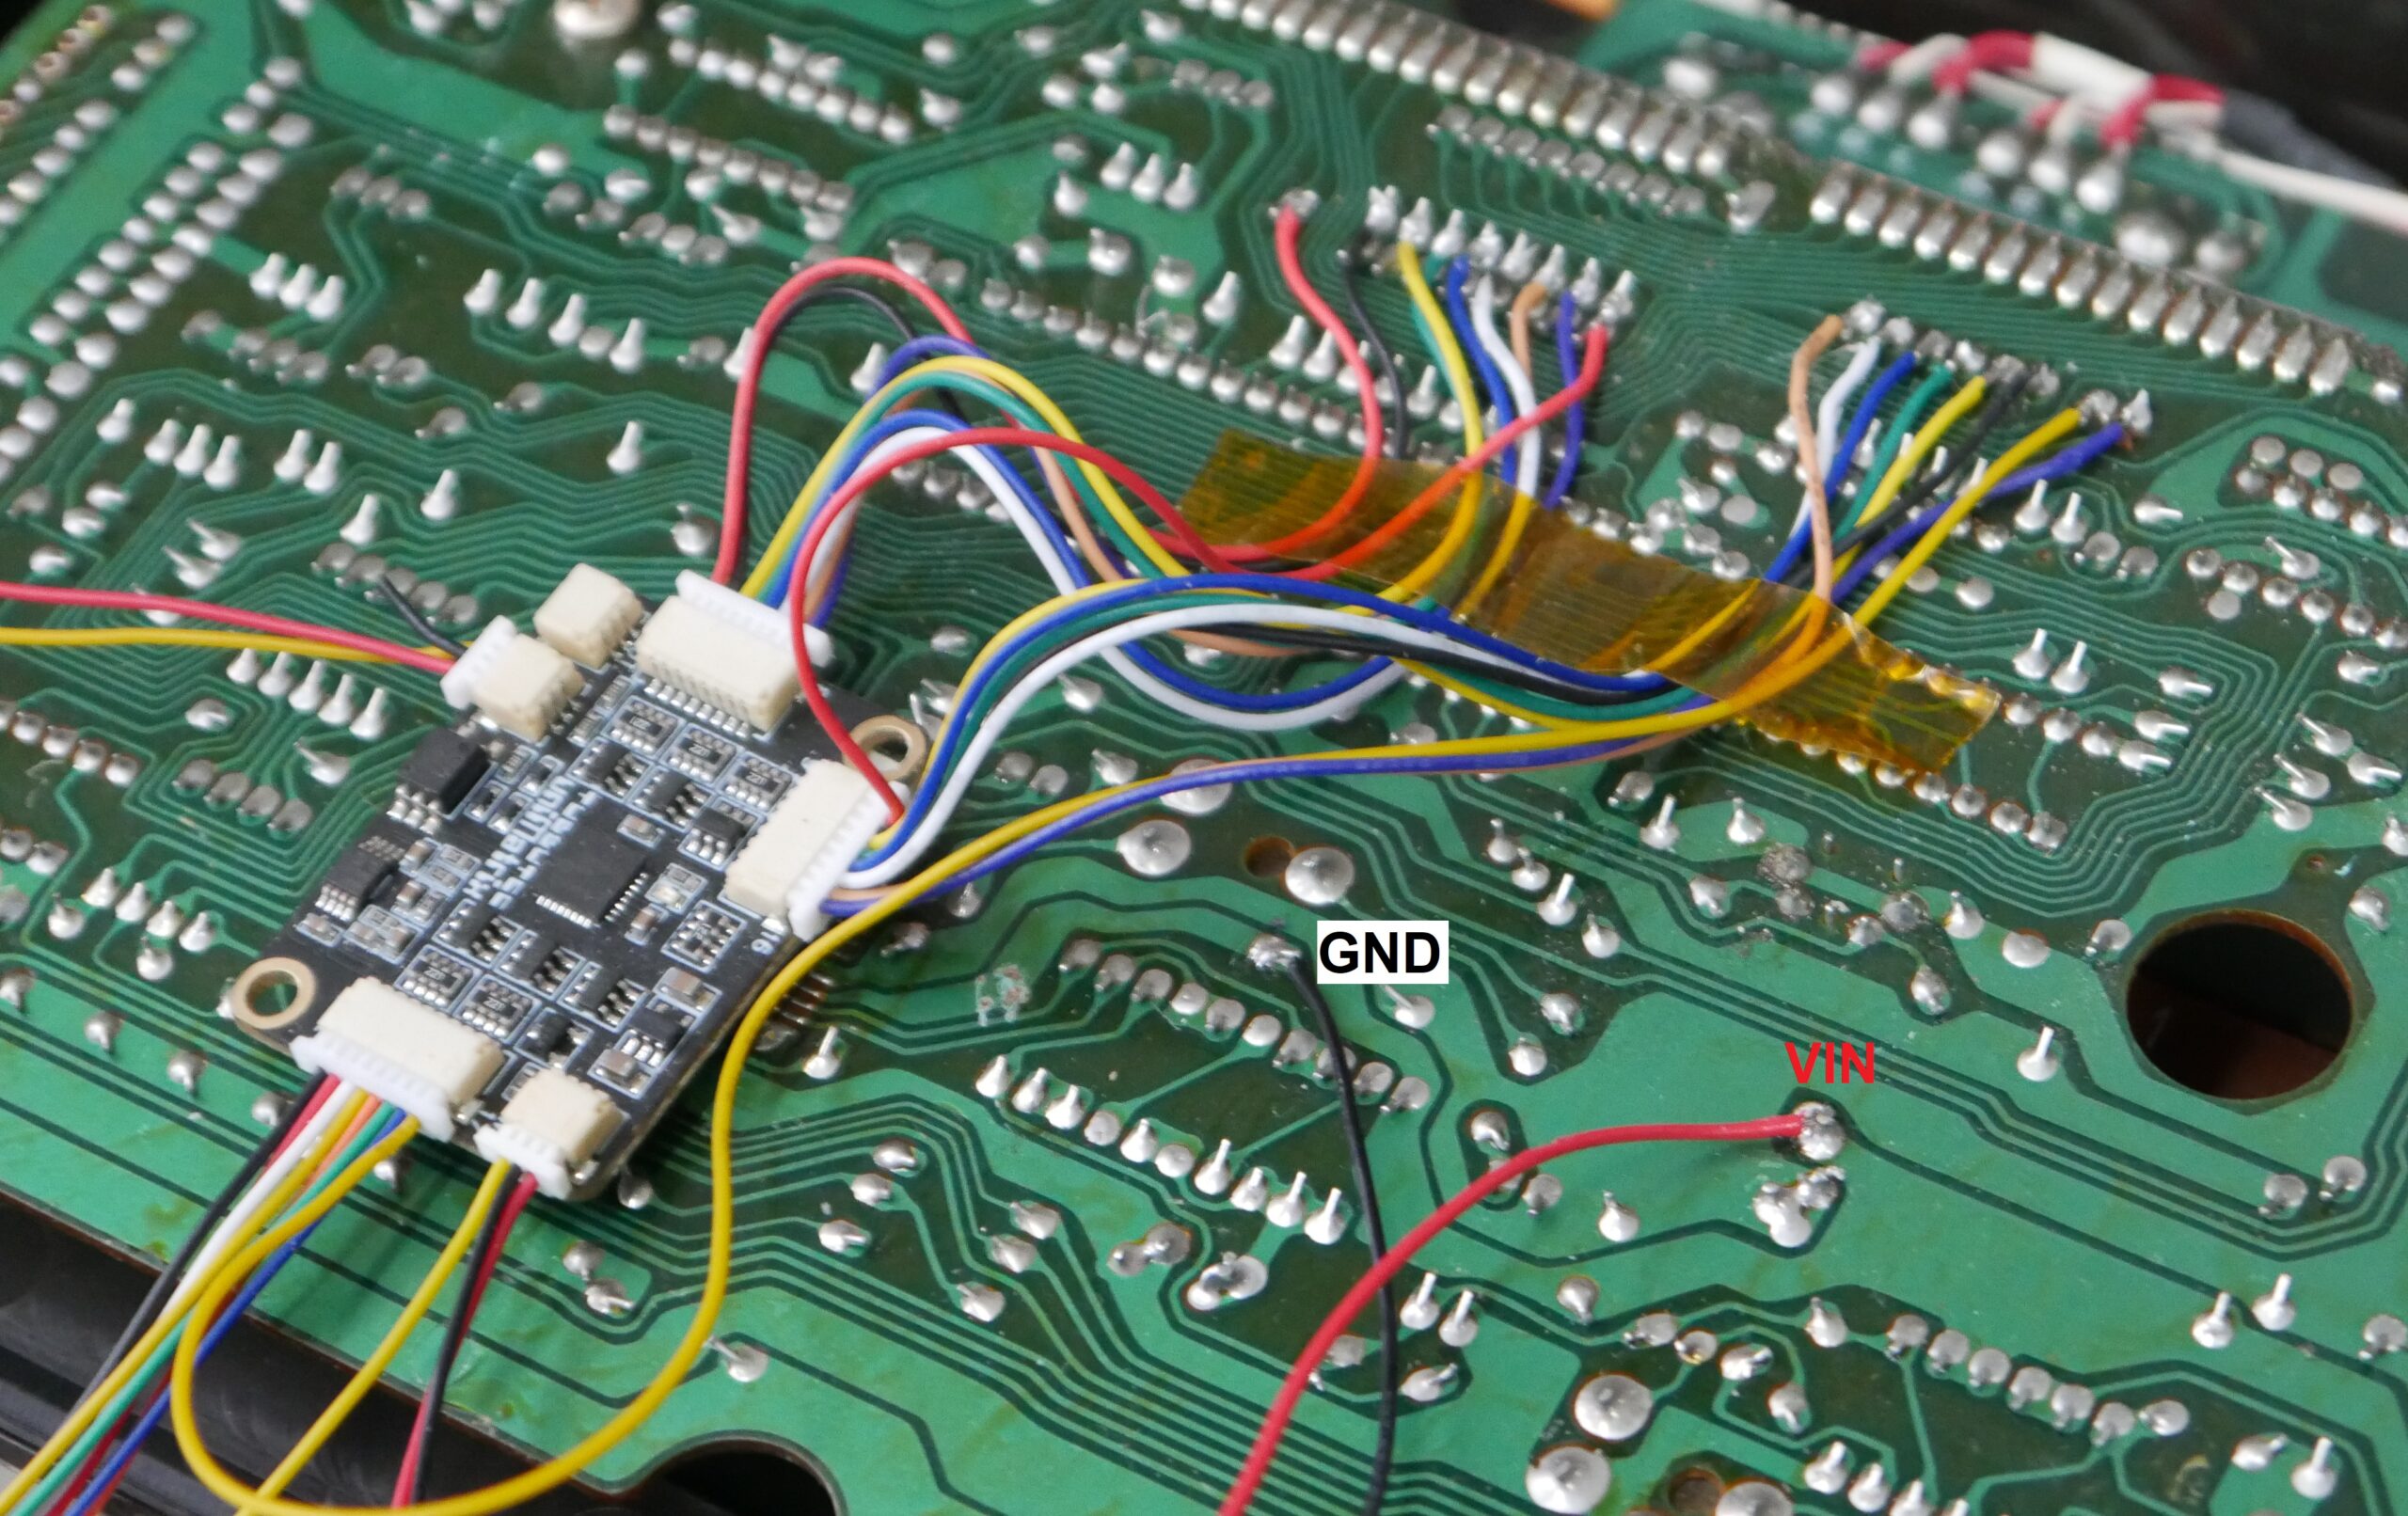
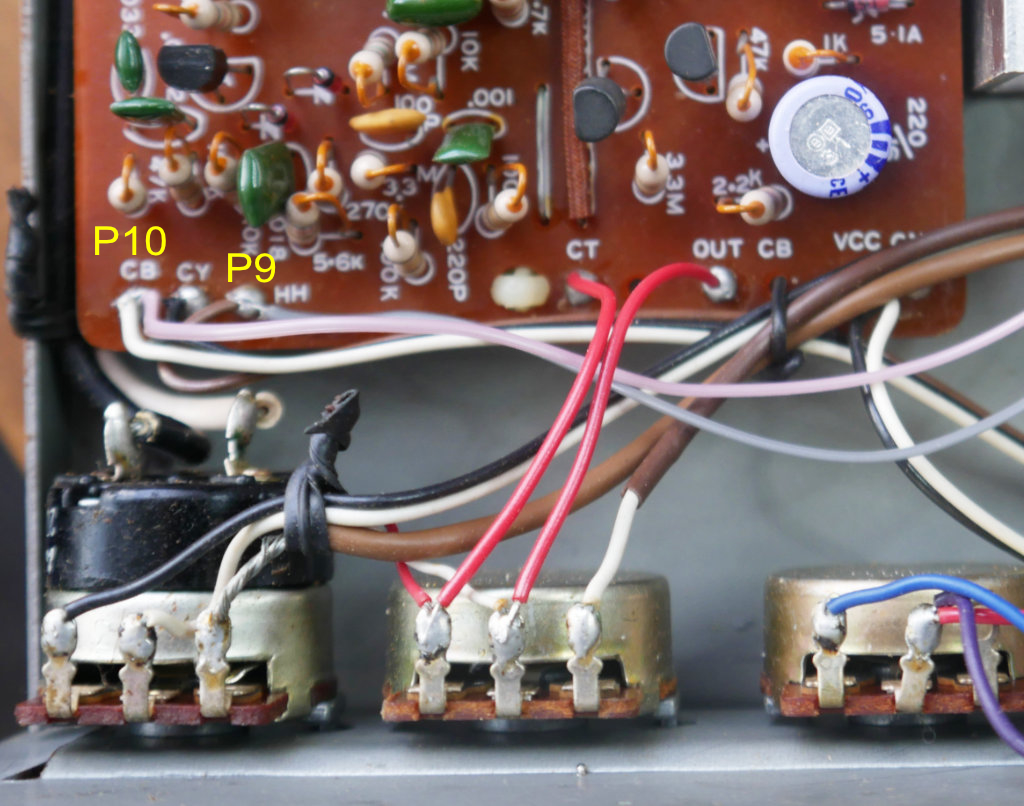
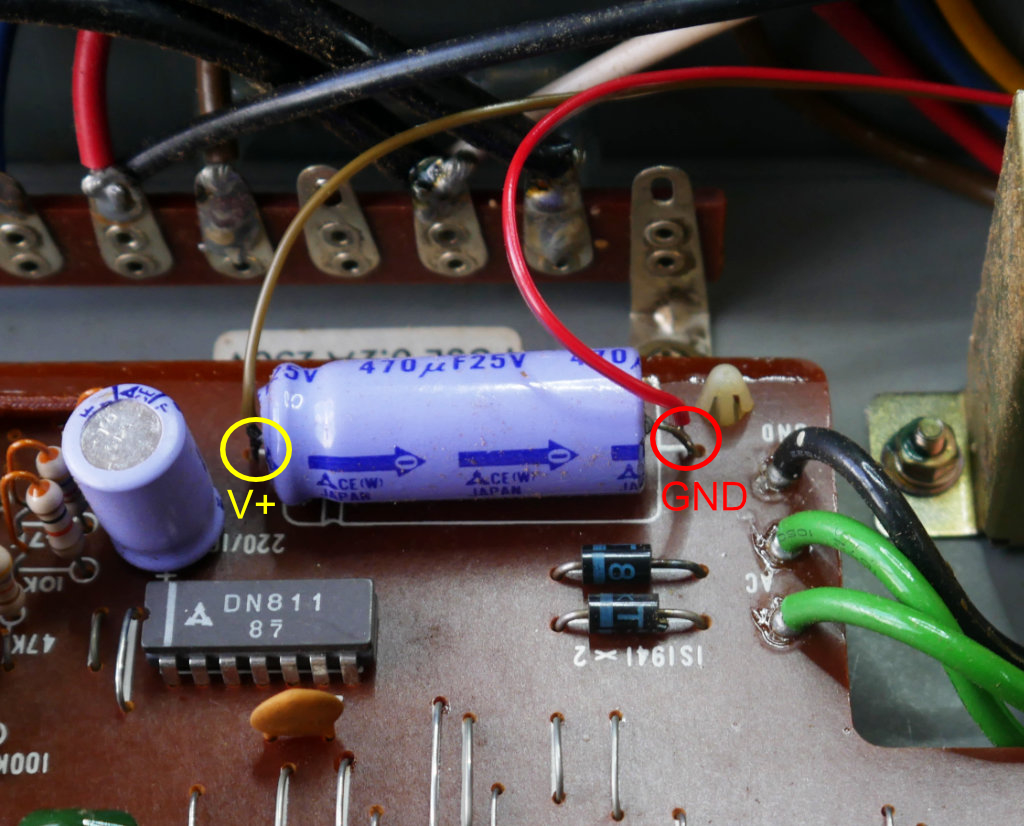
Use double sided tape to mount the uniMatrix board to the big IC on the MT-90 board. Then, solder the wires to the points shown in the picture below. The numbers are the uniMatrix I/O numbers. Do not rely on the wire colors in the picture, these might be different in your version of uniMatrix.
Solder the two power wires Vin and GND to the points shown.
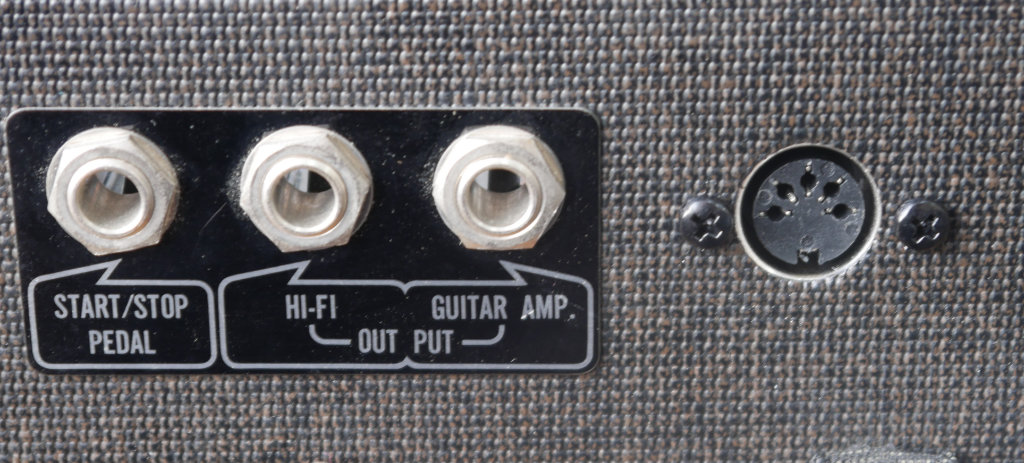
Finally, drill a hole in the side using the drilling stencil provided in the kit, mount the MIDI socket using the two M3 bolts and plug it into the MIDI in connector of uniMatrix.
Using the uniMatrix configurator, load the configuration for MT-90 (right click, save-as) and send it to uniMatrix.
Congratulations, you can now play your MT-90 via MIDI !