Universal MIDI interface for keyboard matrix type synthesizers and more
Description | Machines and manuals | Configurator | Order online
Introduction
uniMatrix is a universal MIDI interface suitable for many synthesizers, drum machines and other gear *. It can interface existing keyboard matrixes directly and provides MIDI input and output. Additionally it offers multiple inputs and outputs to control or read additional parameters both analog and digital.
These features allow it to control many aspects of a synthesizer, not just the keyboard. Often, sound or patch settings, filter cutoff, or similar can be controlled as well.
uniMatrix is freely configurable by using our configurator tool, but we also provide installation instructions for various gear.
* maybe create a midi controlled calculator or a midi controller from a calculator.
Features
- Midi input and (in some cases) output
- Freely configurable universal midi interface
- Can interface existing keyboard matrixes of any size up to 13×9, each contact freely configurable
- Supports Notes, CC, program change, and more
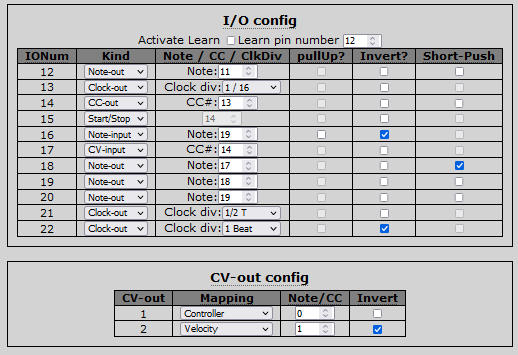
- Up to 22 I/O pins can be configured as digital inputs and outputs
- Outputs multiple MIDI clocks with adjustable divider and MIDI start/stop signals
- 2 additional CV-outputs to control filter or other parameters
- 6 pins configurable as CV-inputs
- Short-push mode to simulate short button presses
- Optional learn button to change the MIDI channel quickly
- Small size fits into almost any gear
- 3-5V supply voltage
- All I/Os with over-voltage protection
- DIN or TRS Midi sockets available
Matrix interface
Many electronic devices utilize a circuit called keyboard matrix, sometimes also referred to as diode matrix to read buttons and switches. Here, buttons are arranged in a grid defined by a number of output pins and input pins. Each output is turned on one-by one and the inputs read. This allows it to read many buttons with a relatively small amount of pins.
uniMatrix can interface this type of configuration by ‘listening’ to the outputs and injecting the correct stimulus signal into the devices inputs at the right time. uniMatrix supports both kinds of polarities as well as a special high-impedance injection method that is sometimes preferable.
At the same time, uniMatrix also reads the buttons or keys connected to the keyboard matrix, debounces and sends out corresponding midi messages.
Each button in a matrix can be freely configured to react to MIDI notes, CC or program change messages. Furthermore, uniMatix can simulate short button presses automatically.
Additional I/Os
I/O pins not used by the matrix interface can be used for other purposes. Each of these I/Os can be used to generate digital signals and react to MIDI Notes or CC.
Each pin can also output its own MIDI clock with adjustable clock divider as well as start/stop signals. Up to 22 different clocks can be used at the same time.
Pins can also be configured as inputs to read digital states and send them out as MIDI Notes or CC.
An analog input is available on 6 of the pins, reading the voltage and sending out MIDI CC messages.
CV-outputs
Two CV-outputs are available. The are suited to control parameters like filter cutoff or other sound parameters. Due to their low resolution they are less suited for pitch-CV though.
CV-outputs can be linked to note velocity, aftertouch, channel pressure. Or they can output values received via MIDI-CC messages.
The board
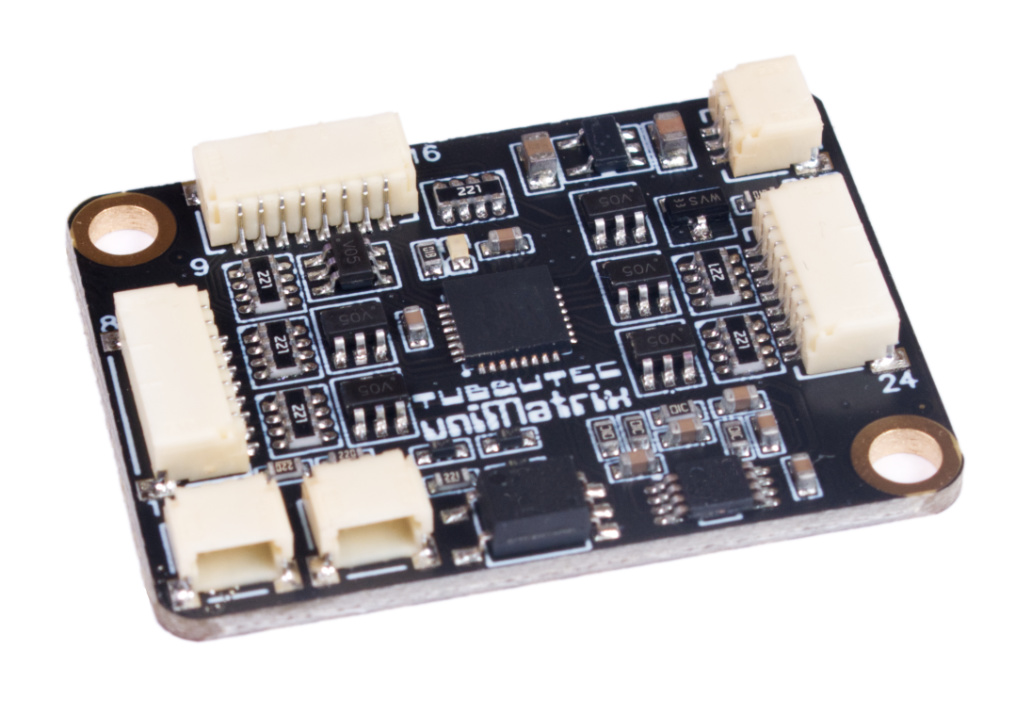
With its small size of only 37x28mm (1.5×1.1 in) and a height of ??, the uniMatrix board fits in even the smallest devices.
There are two ways wires can be connected to the board:
The small 1mm pitch connectors are perfect as they do not add any additional height. We supply crimped wire assemblies with pre-tinned wires with the kit. Various lengths are available.
Alternatively, 2.54mm pitch pin headers can be soldered onto the underside of the board. Here, dupont style connectors can be used. These wires are typically thicker and available in lengths up to 50cm.
Two mounting holes are provided to fix the board inside a device. Alternatively, double sided tape can be used easily, as there are no components on the underside.
uniMatrix works with a supply voltage of 3V – 12V. The voltage on its outputs does never exceed 5V though. All pins are protected against over voltage.
It is possible to interface keyboard matrixes that run on a voltage larger then 5V, as long as the device accepts a 5V signal as valid key press. In such a case, 100k series resistors are recommended at the uniMatrix inputs.
Technical manual
The technical manual explaines how uniMatrix works and how to configure it to work with a specific device. This can help you to use uniMatrix in a device without an existing installation guide. If your device already has an existing installation guide, you do no need to read this manual.
uniMatrix Technical Manual (PDF)
List of machines and Installation manuals
Click on a Link to get to the specific installation manual. If there is no link, we think uniMatrix will work with this machine, but were not able to try it yet.
Generally, uniMatrix works with keyboard matrixes running at 3-5V. In some cases, voltages slightly above that might be fine, too. Another important factor is timing. uniMatrix has a very low latency of 1µS, but in some cases this is not sufficient (SX-210 for example).
If uniMatrix does not work because of tight timing or high voltage, our organDonor interface can be used instead.
Your synth is not on the list at all? Contact us!
Casiotone CT-405
Casio CT-410V
Casiotone 601
Casiotone 701
Casio MT-65
Casio MT-68
Casio MT-90
Casio MT-100
Casio MT-205
Casio MT-210
Casio MT-400V
Casio SK-1 (confirmed working, intsall guide coming soon)
Casio SK-5
Casio SK-8
Casio SK-10
Casio VL-tone
Yamaha VSS-30
Yamaha VSS-100
Yamaha VSS-200
Casio CS-01 (maybe, we need to test this)
Yamaha PSS-140
Yamaha PSS-170
Yamaha PSS-270
Yamaha PSS-380
Yamaha PSS-390
Yamaha CS70
.. and countless more
Trident
Elka
Elka Synthex
Kawai / Teisco
SX-210 Timing issues, use organDonor instead.
SX-400
100p
100f
PPG
PPG Wavecomputer 360
Wave 2
Wave 2.2
Texas Instruments
Speak & Spell
Oberheim
OBXa
Moog
Memorymoog
uniMatrix is similar to the Highly Liquid UMR-2 interface, but does have more features and overvoltage protection


