
This is how to add velocity sensitive midi to the Roland TR-77 drum machine using Tubbutec Unipulse.
Installation is very strait forward, you just need to solder some wires and drill holes for the Midi socket and learn button. To get a sound over midi, the machine needs to be started and no pattern selected.
Config file here: TR-77 config file
This manual is just a brief description of how to install the uniPulse, for further information please check out the uniPulse page.
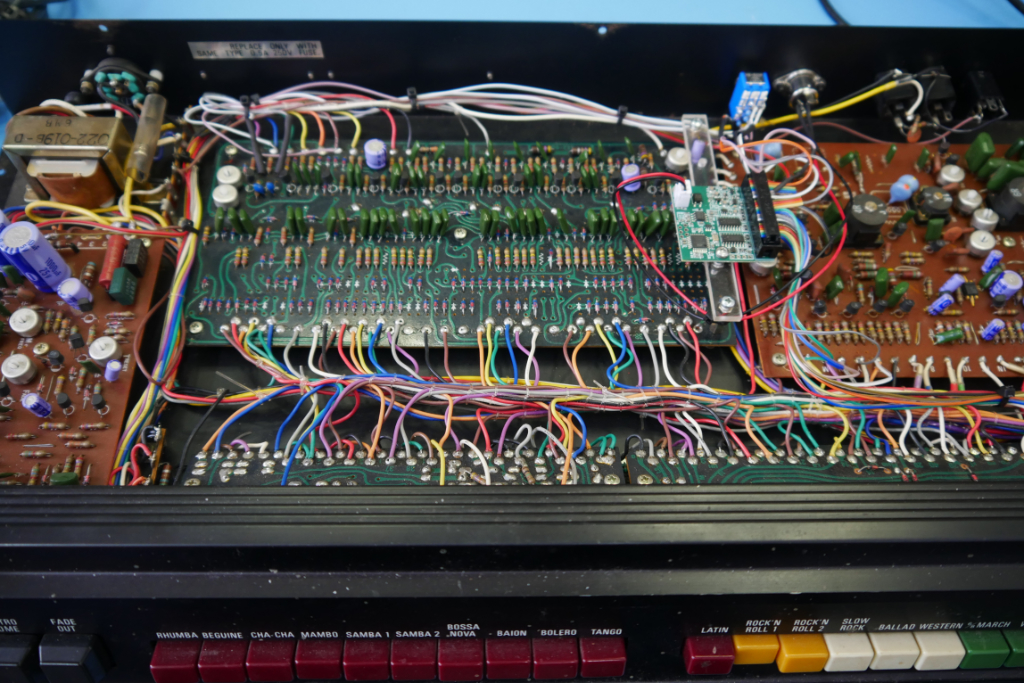
Trigger points
Trigger points are shown for all 13 instruments including Maracas:

trigger inputs 1-7
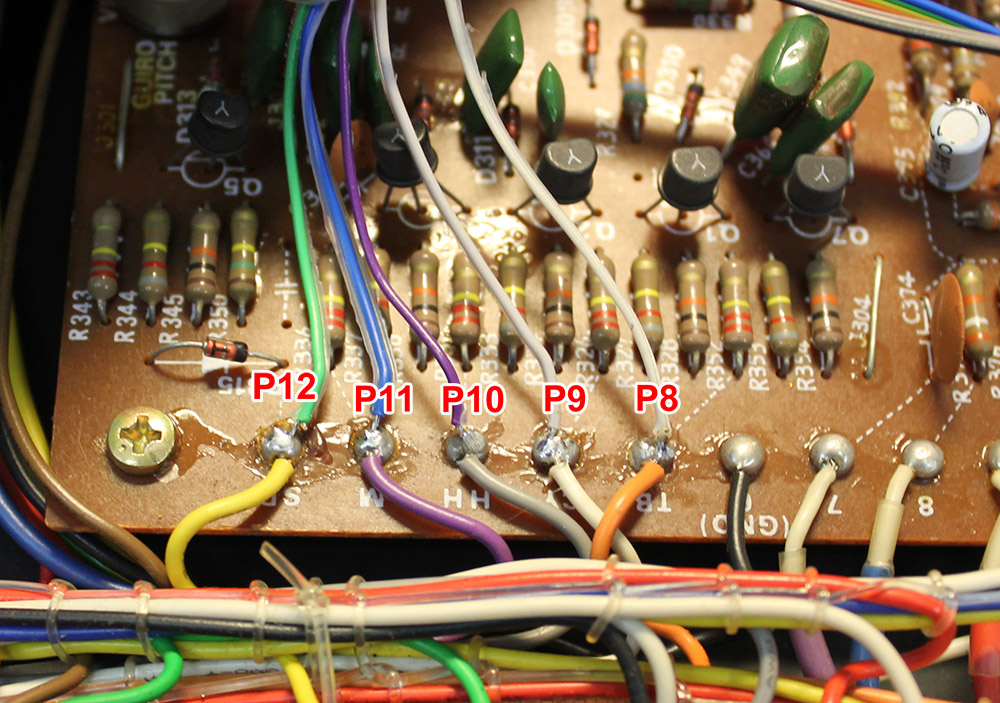
trigger inputs 8-12

Maracas CV input (Resistor is 56K)
This is where to get the supply voltage for the uniPulse:

Unipulse supply connections
CLOCK SYNC
It is possible to sync the TR-77 to midi clock, you will however need to press the start button of the TR-77 once after turning it on.
- Start the machine using the ‘button’.
- Start the midi clock
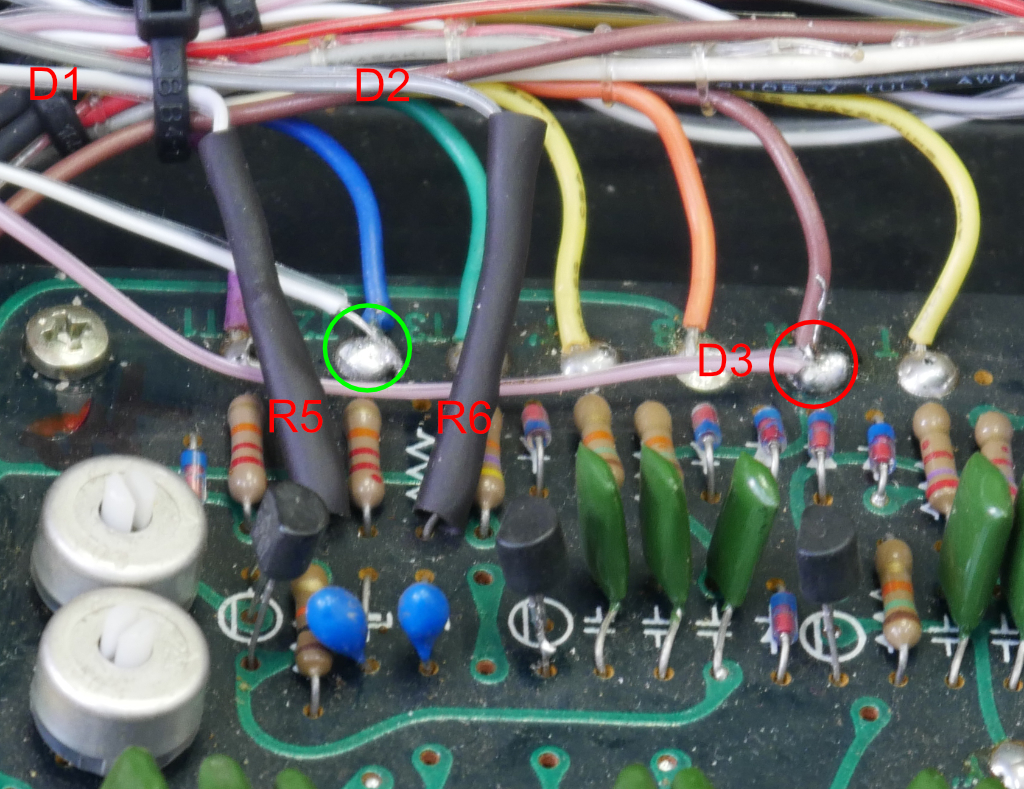
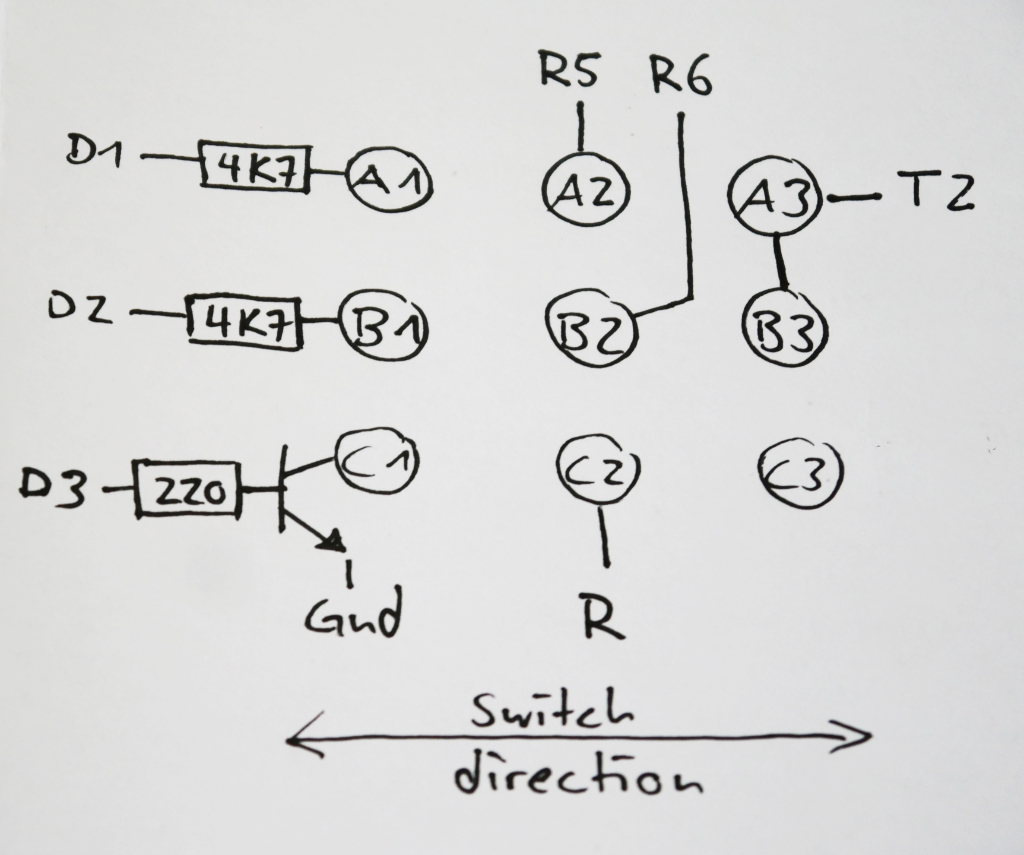
In order to add midi sync you need to lift one leg of resistors R5 and R6 on the TR77 pcb, see picture. Add a 4K7 resistor to each pin A1 and B1 of the provided switch. Connect the D1 wire of Unipulse (white) to the resistor soldered to A1. Connect the D2 wire of Unipulse (grey) to the resistor soldered to B1. Run a wire from pin A2 to the lifted leg of R5, and a wire from B2 to the lifted leg of R6. Link pins A3 and B3, run a wire from A/B3 to the solder point marked “T2” on the TR77 pcb (marked green in the picture).
To add Start/Stop you need to solder the collector of the provided NPN transistor to pin C1 of the switch. Connect the Emitter to Gnd (you can use the orange Gnd wire of Unipulse). Run a wire from pin C2 to the solder point marked “R” on the TR77 pcb (marked red in the picture).
The transistor and resistors are included in the kit. Just order the TR-77 kit.
Start/Stop and Sync connections
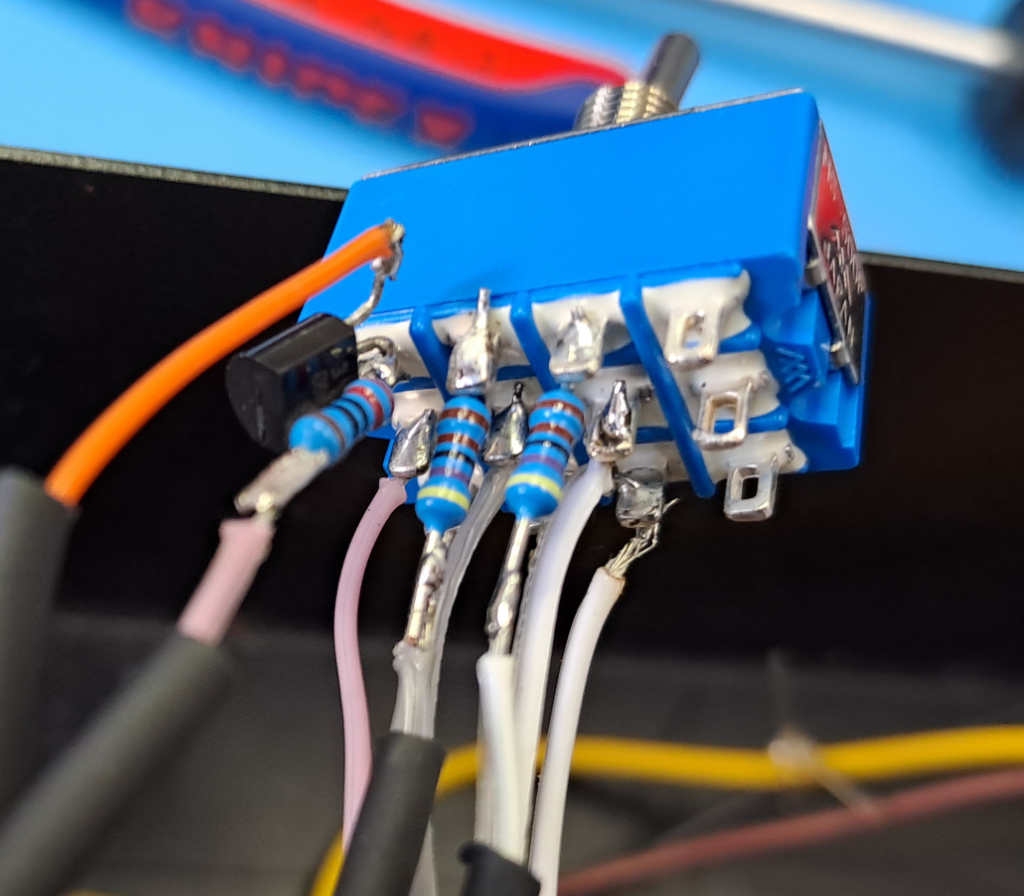
Switch Connections
Installed board
Installed MK3 board, using a plastic strip for mounting