
This manual shows how to install uniPulse in the ELKA Drummer One and thus allows to trigger voices via midi and to sync the Drummer One to midi Clock.
Thank you very much to Thomas Kayser of SynthMedic for figuring this out and providing pictures.
After installation use the Config Tool to upload the Config file for ELKA Drummer One (right click, save as).
Connecting trigger points
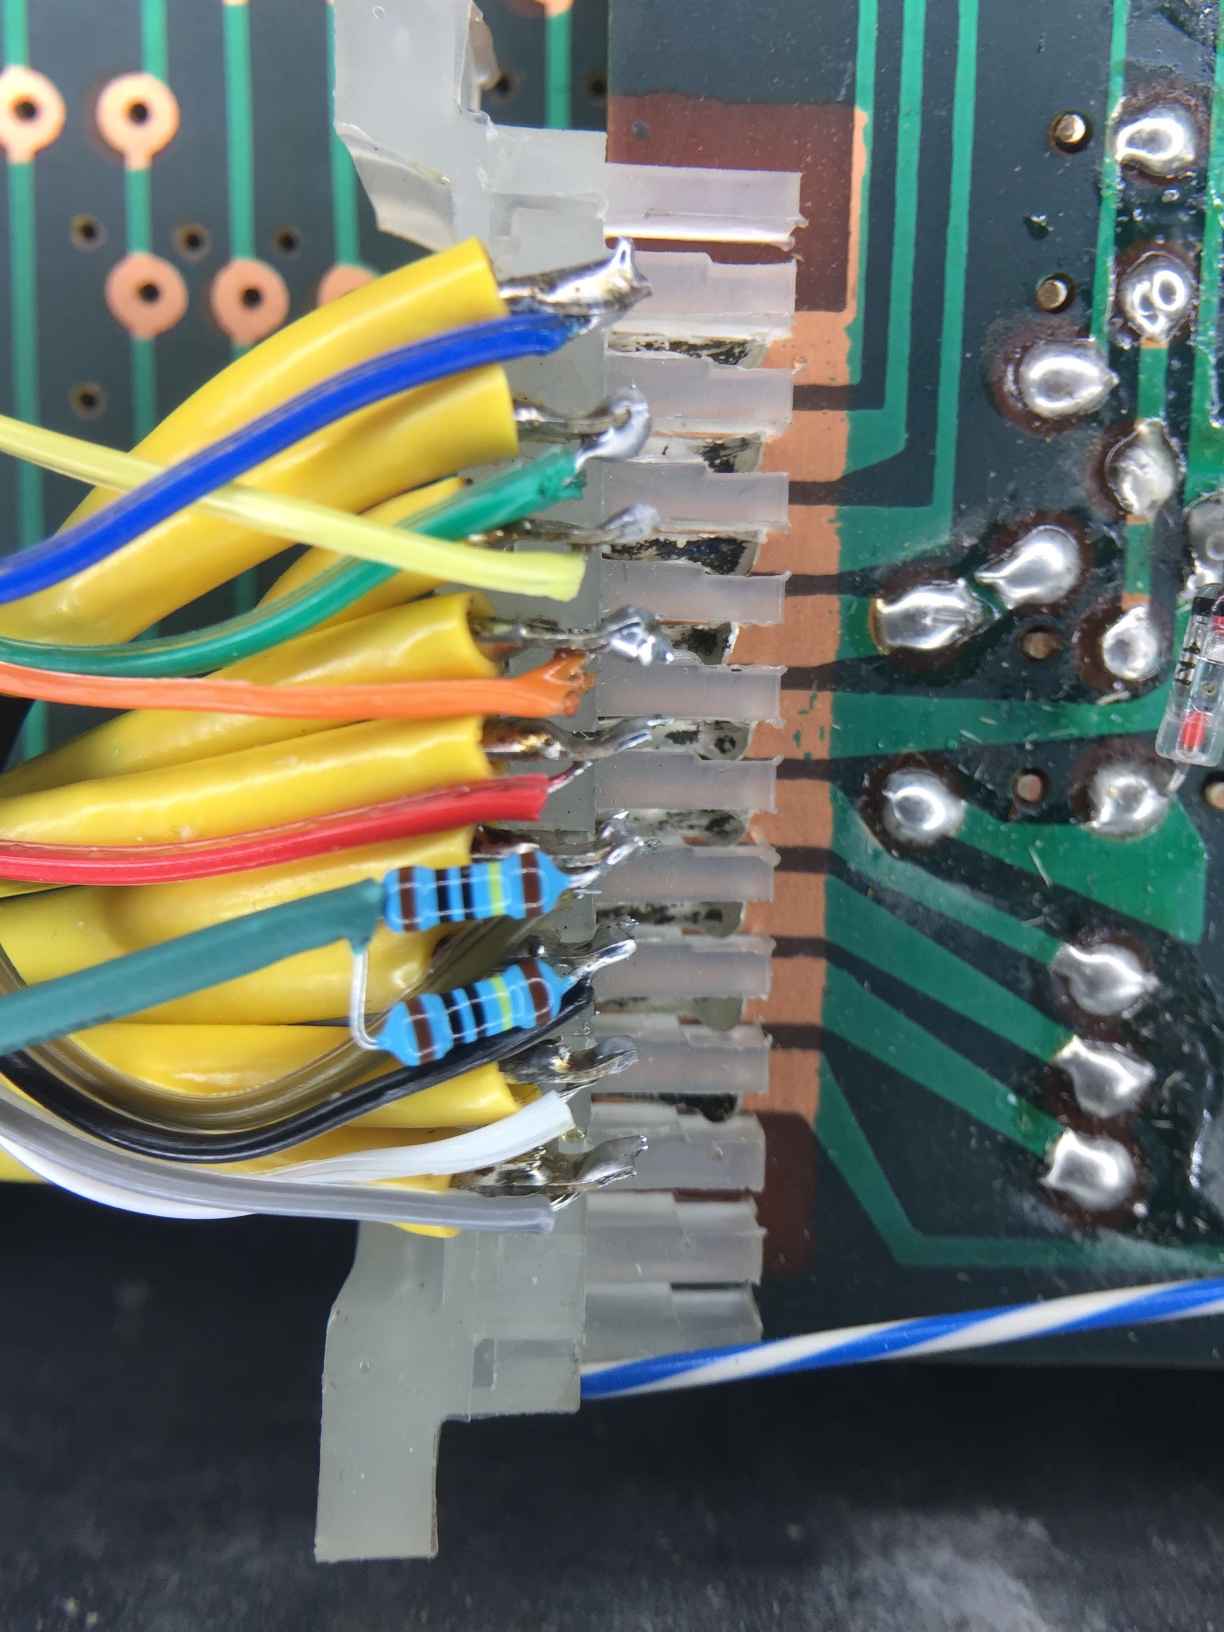
Below you can see the installed uniPulse. Trigger points are on the right the picture below shows the trigger points in a bit more detail. Two of the triggers needed additional 1Meg resistors to ground which can also be seen in the picture. UniPulse channels 1-9 are used.

Midi Clock Sync
If you like, you can also sync the Drummer One to midi clock. This requires a bit of additional circuitry. A two-pole switch is used to switch between internal and midi clock. This switch is provided with the uniPulse kit since uniPulse MK2. You will also need two general purpose NPN Transistors and 2x10k and 2×2.7k resistors. The circuit can be seen below. Its purpose is to level shift the clock and gate voltages.
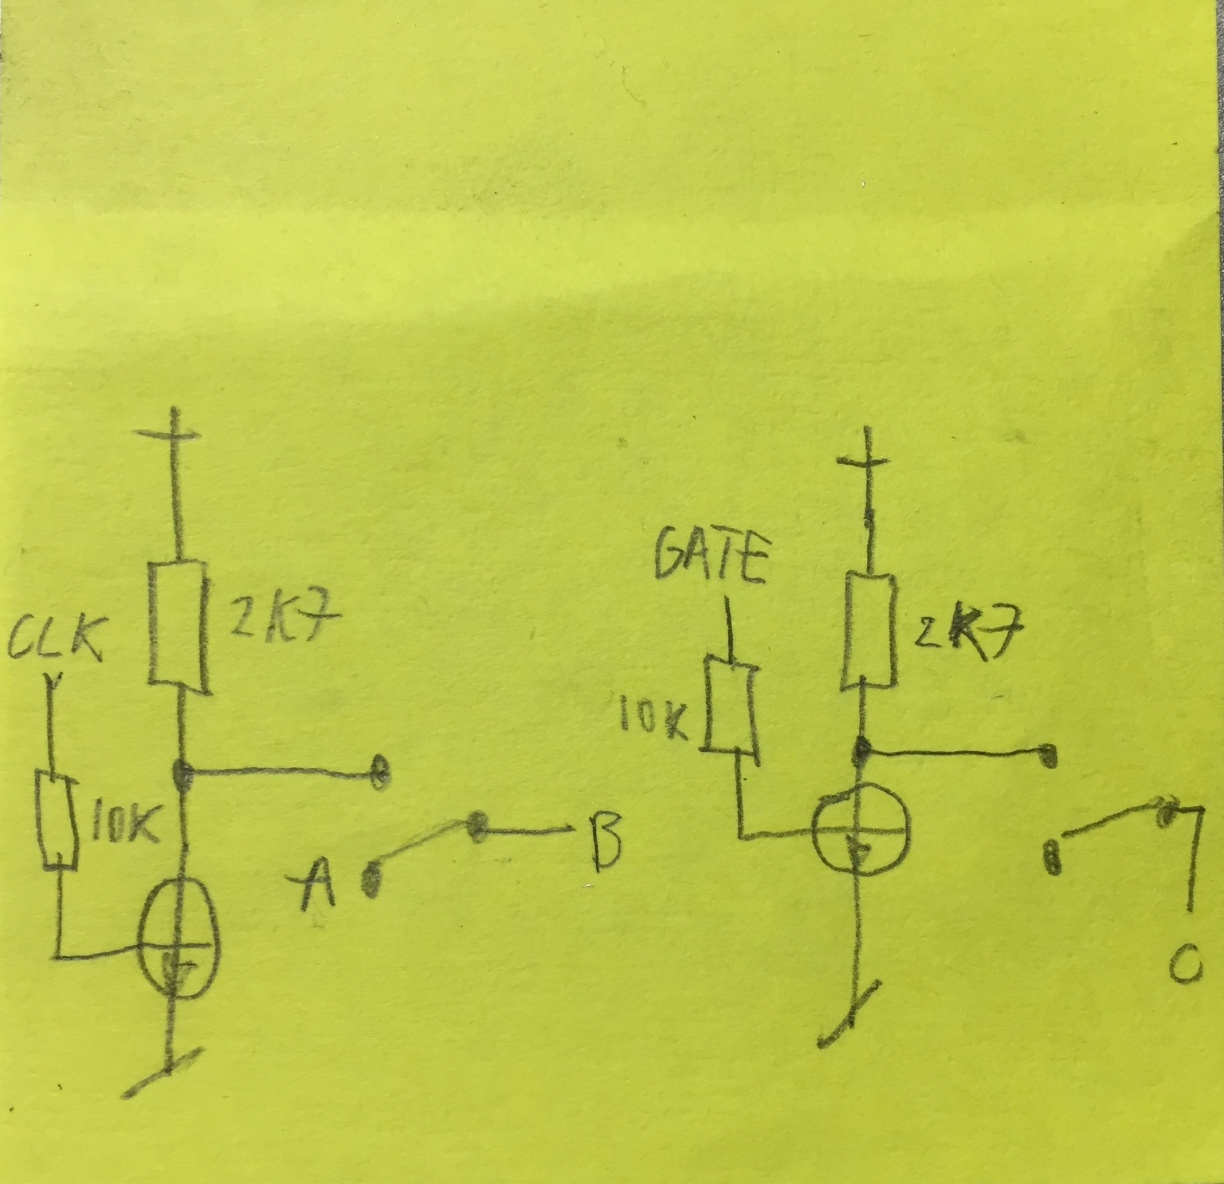
The GATE signal is connected to uniPulse pin D1, the CLOCK signal to uniPulse pin D2.
The picture below shows the location of the C point and the circuit on a prefboard. To access points A and B, one leg of a capacitor needs to be desoldered. This is also shown in the picture below and in more detail in the next picture.


Installing the uniPulse board
You can mount the uniPulse board in the case using distancers as shown here:

The Drummer One needs to be in start mode with all Rhythms deselected in order to be synced to midi.