audiowerkstatt – trigger2midi2trigger

192,44  (VAT may be added after entering your shipping address)

VAT will be calculated after entering your shipping address.

Only 2 left in stock

Category:

Description

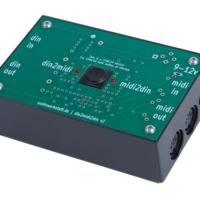
The audiowerkstatt trigger2midi2trigger v2 converts analog trigger-clock-signals to MIDI-clock-signals and vice versa.
It can also be used as an analog trigger-tool.

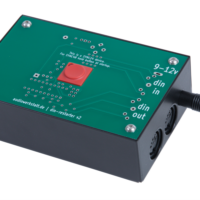
If used as trigger-clock-to-MIDI-clock-converter or MIDI-clock-to-trigger-clock-converter, there is always a MIDI-clock-signal (incl. start/stop) sent at the “midi out”-jack. At the tip of the “clock”-phone-jack, an analog trigger-clock-signal (v-trigger: 0v/5v, s-trigger “open”/”closed”) is sent. The tip of the “start/stop”-phone-jack is 5v while the masterclock is running and 0v while the masterclock is paused for v-trigger and “closed” while the masterclock is running and “open” while the masterclock is paused, if s-trigger is used.
A clock-source can be connected to the “midi in”-jack or to the ring of the “clock”- and “start/stop”-phone-jack.

Normal insert-cables can be used to connect the analog inputs/outputs. If only the analog outputs are used, normal phone-jack-cables (mono or stereo) can be used.

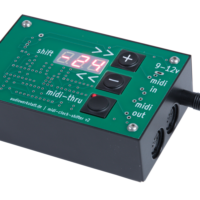
The following parameters can be adjusted:
1. clock-source (MIDI-clock or analog trigger-clock).
2. Trigger-type of the analog input (s-trigger or v-trigger).
3. Trigger-type of the analog output (s-trigger or v-trigger).
4. Clock-divider of the incoming analog trigger-clock (1/4, 1/8. 1/16 or 1/32).
5. Clock-divider of the outgoing analog trigger-clock (1/4, 1/8. 1/16 or 1/32).
6. Pulse-length of the outgoing analog trigger-clock (adjustable in 6 steps, the pulse-length is calculated dependent on clock-divider and clock-frequency).

In addition to the clock-signal, start-/stop-signals from the masterclock are detected and processed, but it it also possible to send start-/stop-signals manual.

The settings for the analog output (trigger.type out, clock.divider out and pulse.length) can be changed without losing synchronisation, while the masterclock is running.

The audiowerkstatt trigger2midi2trigger v2 can also be used as a tool for analog-trigger-signals, if it isn’t used as a converter.

The following uses are possible:
a) „S-trigger“ to „v-trigger“ converter
b) „V-trigger“ to „s-trigger“ converter
c) Analog clock-divider
d) Analog clock-multiplier
e) Gate to trigger converter
f) Trigger to gate converter with adjustable gate-length

All settings will be saved and restored at startup.

Details can be found in the manual.

Additional information

Weight 0,38 kg
Dimensions 14,5 × 9 × 9 cm

Product safety

Manufacturer information

audiowerkstatt UG (haftungsbeschränkt)
Weserstr. 78
12059 Berlin
Deutschland
E-Mail: info@audiowerkstatt.de

Product safety documents

Safety instructions

Product Safety Information

Standalone MIDI/DIN-Sync Processing Tool

Important Safety Information

This product is a standalone MIDI/DIN-sync processing tool designed for use in music production and performance environments. Please read this safety guide thoroughly before using the product.

General Warnings

  1. Electrical Safety:
    • Use only the provided external wall adapter or a manufacturer-approved equivalent.
    • Ensure the power outlet voltage matches the adapter’s input requirements.
    • Do not use the device if the wall adapter, cable, or connectors appear damaged.
  2. Risk of Electric Shock:
    • Do not open the device enclosure or attempt to repair the product. Internal components carry electrical currents that could cause injury.
    • Avoid exposing the device to moisture, liquids, or excessive humidity to prevent electric shock or damage.
  3. Heat Generation:
    • The device may generate heat during prolonged use. Ensure adequate ventilation and avoid covering the unit while in operation.
    • Do not place the device near heat sources such as radiators or direct sunlight.
  4. Choking Hazard:
    • The product contains small parts and should be kept away from children under 3 years old.
  5. Cables and Connections:
    • Route cables safely to avoid tripping hazards or damage.
    • Do not force connectors into ports; ensure alignment before insertion.
  6. Environmental Considerations:
    • Do not expose the product to extreme temperatures, vibrations, or impacts, as these may damage the device or impair functionality.

Usage Instructions

  1. Connect the provided wall adapter to a power outlet that matches the adapter’s voltage rating.
  2. Plug the adapter into the device’s power input port.
  3. Use appropriate MIDI or DIN-sync cables to connect the tool to your other equipment, ensuring proper alignment of connectors.
  4. Turn on the device using the power switch (if available) and configure it as instructed in the user manual.

Maintenance and Cleaning

  • Disconnect the device from power before cleaning.
  • Use a dry or slightly damp cloth to clean the exterior. Avoid using harsh chemicals or solvents.

Environmental Safety

  • At the end of its life, dispose of the product, cables, and wall adapter in accordance with local electronic waste recycling regulations.

Liability Disclaimer

  • The manufacturer is not responsible for injuries, damages, or malfunctions caused by improper use, unauthorized modifications, or the use of non-approved power adapters or accessories.