Description
Rear power panel replacement for Korg Polysix and Korg Mono/Poly.
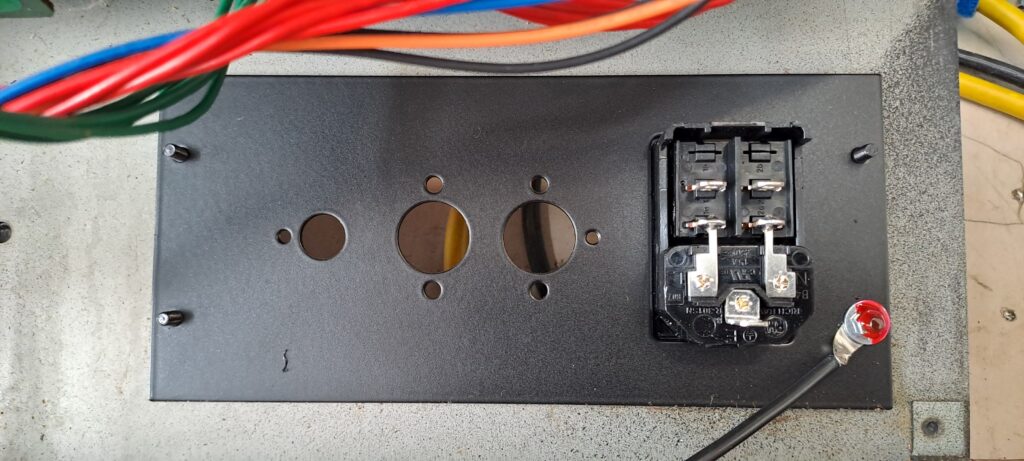
Replaces the existing rear panel and includes
– A C14 socket instead of the fixed power cable
– Holes for Midi sockets (for example for our ModyPoly kit)
– Hole for a sustain socket or other 6.3mm jack socket
If midi and sustain sockets are not used, they can be covered up with the existing serial plate.
There is also enough space for additional holes. This allows to install sockets such as external audio in, pan-mod or similar mods without damaging the original case.
The kit includes:
- Panel: steel, poweder coated, holes drilled and threads cut
- C14 socket with switch
- brown, blue and green-yellow wires with cable lugs, pre-tinned
- 4x M3 bolts for mounting (you can use the original bolts as well)
- M3 nut and lockwasher
- ! The C14 power cable is NOT included !
The panel is very easy to install:
– Remove the existing power cable by desoldering the wires
– Desolder the black switch wires. Keep one of them.
– Remove the 4 screws of the existing panel.
– Clip the C14 socket and switch into place in the opening of the new panel
– install the new wires on the C14 socket as shown (just plug and play)
– install the new panel and solder the wires to the board
– bridge the switch contacts on the board with the black wire (see picture)
– Install Midi sockets and sustain socket, or cover the holes with the serial plate.

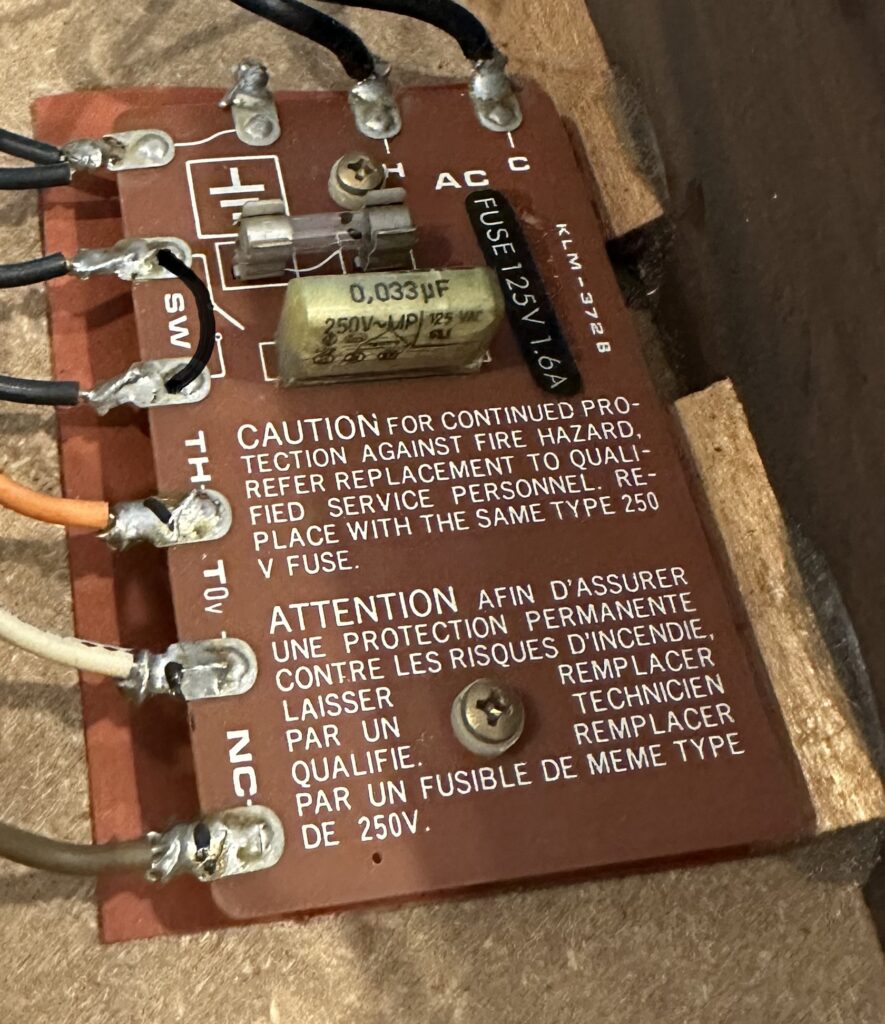
Note: In some cases, the power supply board looks like in the picture below. There are additional SW contacts (switch contacts). When installing our panel, these need to be bridged as the switch is already wired. You can use one of the original black cables to do so.

Some MonoPolys have the Earth wire attached to the back panel. In this case use the provided M3 nut and lock washer to attach the Earth wire to one of the screws that hold the rear panel, see picture. Please make sure that you can measure continuity between the metal case and the Earth wire. You can use some Loctite to secure the nut.

Product safety
Manufacturer information
Manufacturer:
Tubbutec GmbH, Storkowerstr. 115A, 10407 Berlin, Germany
supportⒶtubbutec.de (replace Ⓐ with @)
Product safety documents
Safety instructions
Product Safety Information
DIY Synthesizer Kit
Important Safety Information
This product is intended for experienced hobbyists aged 14 years and older with basic knowledge of electronics. Improper assembly, handling, or usage may result in injury, damage, or malfunction. Please read and follow all instructions carefully.
General Warnings
- Electrical Hazards:
- The kit contains electronic components that may involve exposure to low-voltage electricity.
- Ensure the power supply does not exceed the voltage and current ratings specified in the assembly guide.
- Avoid touching live circuits or connections while powered on.
- When installing in a synthesizer, make sure it is unplugged. Some synthesizers may expose high voltage when the case is open.
- Small Parts:
- Contains small parts that can pose a choking hazard. Keep out of reach of children under 3 years old.
- Heat and Fire Risk:
- Some components may generate heat during operation. Do not leave the synthesizer unattended when powered on.
- Use only components provided or specified by the manufacturer to avoid overheating or fire hazards.
- Sharp Edges:
- Certain parts, such as leads or enclosures, may have sharp edges. Handle with care and use protective gloves if necessary.
- Soldering:
- Soldering iron temperatures can exceed 400°C. Use caution to avoid burns. Always solder in a well-ventilated area to avoid inhalation of fumes.
Usage and Assembly
- Intended Use: This kit is designed for hobbyist use to build a functional synthesizer. It is not a toy.
- Assembly Guidance: Follow the included step-by-step instructions. If any part is unclear, consult the manufacturer or seek advice from experienced individuals.
- Testing and Operation: Test the synthesizer only after all connections are secure and verified against the schematic provided.
Environmental Safety
- Dispose of electronic components, packaging materials, and soldering byproducts responsibly and in accordance with local regulations.
Maintenance
- Periodically inspect the synthesizer for wear, loose connections, or exposed wiring.
- Disconnect the power supply before performing any maintenance or adjustments.
Liability Disclaimer
- The manufacturer is not liable for injuries, damages, or malfunctions resulting from improper assembly, modification, or use of this product outside its intended purpose.


